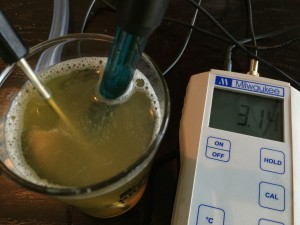
Harvesting your “Crops”: Top Cropping Yeast for Homebrewers

John Smiths Brewery
John Smiths Brewery

Happy New Year! I suppose this entry about harvesting your abundant crop should have appeared at Thanksgiving, but better late than never, and it’s never too late to give thanks. So here we go.

You’ve heard and read about it a thousand times in your books about classic brewing techniques. You often see the phrase “a true top cropping strain” when browsing the White Labs of Wyeast yeast inventories. Read an article or watch a video about British brewing and you’re almost sure to hear or see it mentioned. The famous yet elusive top cropping of yeast.

A conversation about top cropping would certainly be incomplete without mention of the famous Yorkshire square. Without going into too much detail the Yorkshire square is a fermenting vessel dating back some 200 years. Traditionally, it is a 2-story square fermenter built from Welsh slate. The top story has a walled deck with an open top. Fermentation takes place in the bottom chamber and the yeast foam pushes into the top chamber and settles onto the deck. The fermenting wort from the bottom of the chamber is pumped over the foam in the top to keep the yeast mixed in. Eventually, the pumping stops, and the beer in the bottom settles and clears. This beer undergoes further manipulation, but that is not relevant to our discussion here. Some breweries still use the old slate square fermenters, but many modern breweries have turned to stainless steel squares or even cylinders. It’s not the shape or material that is important; its the method. Several breweries use the Yorkshire square method including Samuel Smith’s, Theakston, and Black Sheep. Black Sheep explains their process on their website. Also, this guy built his own Yorkshire square with, apparently, nice results. You may have to scroll down his page to find the square. However, before you go on a slate search, remember, it is the process, not the shape or materials used that we are worried about.
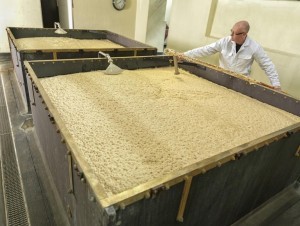
 

Yorkshire square with yeasty head and the fan shaped recirculating arm visible.

One of the advantages of using this “open fermentation” method is that the brewer can “crop” or collect yeast by removing the foam from the top of the fermenting wort, thus the name top cropping.

Before this post becomes a lesson on Yorkshire squares, let’s get to talking about harvesting yeast by top cropping. There are several methods used by homebrewers. One involves using a big blow off tube from a carboy running into a sanitized container. When the brewer fills the carboy, he or she leaves minimal head space. As the “true top cropping strain” begins to work, the foamy, yeasty head will push out through the blow off and into the container. However, this method seems a bit messy and complicated for me to mess with. I would prefer less clean up.

The method of top cropping I use is much easier in my mind to accomplish. My method is similar to the method of Arcadia Brewing except on a much smaller scale. They use buckets and trash cans with big cylindrical fermenters. I use a spoon and mason jars with an 8 gallon Ale Pale. I start by selecting a strain of yeast that lends itself to top cropping. (A list of top cropping strains appears at the end of this post.) For this post I chose to brew a best bitter using Wyeast 1469 West Yorkshire Ale. This yeast is the yeast used by the Timothy Taylor Brewery of Landlord fame.

I brewed my beer as I normally would. I’ll spare you the boring details since, I assume, if you are reading a blog post about top cropping, you probably already know how homebrewing works. I’ll stick with things relevant to top cropping

  1. It works best to use an 8 gallon fermenting bucket for this method.
  2. Pitch a normal amount of yeast into the bucket with your cooled wort. Place the bucket
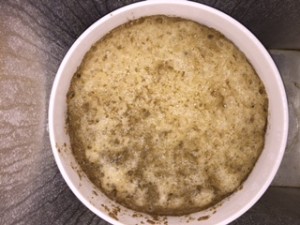
    Dirty foam just before the first scraping.
    Dirty foam just before the first scraping.

    lid loosely in place and ferment as normal.

  3. 24 to 48 hours after pitch remove the lid. A “dirty” foam will have appeared on your beer. Use a sanitized spoon to remove the “dirty” parts. This will consist of hop bits and protiens that get pushed to the top by initial fermentation. Discard this foam. Reset lid loosely in place. Boil about a gallon of water and place in the fridge to cool over night.
  4. 72 hours after pitch reopen your bucket. At this time you should see a nice thick cleaner foam on your fermenting beer. Use a sanitized spoon to scrape this foam off and place it into sanitized mason jars. Use as many jars as you need. Use the pre-boiled
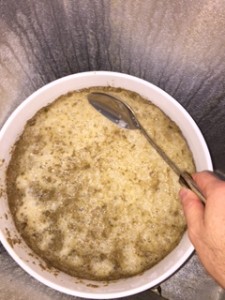
    Harvest with a sanitized spoon. I know this looks a lot like the dirty pic above, but it is vastly different. I promise.
    Harvest with a sanitized spoon. I know this looks a lot like the dirty pic above, but it is vastly different. I promise.

    cooled water to fill the mason jars full of foam. You can pour right on top of the foam. Loosely close the lids of the jars and refrigerate. Finally, completely seal your fermenter lid complete with air lock.

  5. A couple of hours after harvesting vent the mason jars as the yeast foam will want to off gas. Once the yeast settles, seal the jars tightly and store in the refrigerator. You should get enough yeast in each jar for a 5 gallon batch if you use it fairly quickly. If not, just make a starter and move forward.
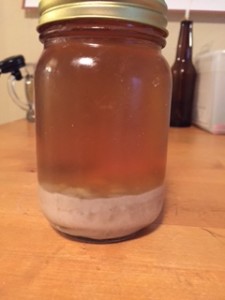
Harvested yeast after a day or two in the fridge.

A couple of things to remember are that you can keep harvesting from this one initial pitch for quite a while before having to buy another smack pack. Just remember to skim and harvest on the same schedule for each subsequent batch. This will keep your yeast consistent. If you harvest early, you may get cells that are quick to peter out. If you harvest too late, you will increase your chance of getting cells that have a tendency not to flocculate. So keep it on schedule, and you should have no trouble fermenting later batches. Always try to harvest from lower gravity lower hopped beers. I have heard of 8 to 10 repitches using this method. I’ll edit this post after I brew with the cropped yeast to let you know how it went.

Top Cropping Yeast Strains

Wyeast 1187 Ringwood Ale

Wyeast 1318 London Ale III

Wyeast 1469 West Yorkshire Ale

Wyeast 3068 WeihenstephanWeizen

Wyeast 3638 Bavarian Wheat

Wyeast 3944 Belgian Witbier

WLP 022 Essex Ale

WLP 038 Manchester Ale

WLP 039 East Midlands Ale

This is by no means intended to be all the strains that are good for top crop harvesting.


A Taste of the Deep South(west)

Enchiladas and American Pale Ale

The argument of just what makes up the South is long and energetic. Seemingly age old questions like “Is Maryland in the South?” as well as brand new arguments such as “How in the world is Missouri in the SEC? They aren’t even in the South, much less the Southeast!” keep cropping up year after year. Many of us in the Deep South think Memphis is “up north” while Memphians would certainly say they are more Southern than Miami, which, is, in fact, further south than all of us. I guess it depends, like most anything else, on perspective. If you feel Southern, you are. Never mind trying to define the authenticity or “Southernness” of others.

With that in mind, I want to talk about one of those places that, depending on whom you ask, is unquestionably Southern or, as the next girl may say, seated firmly in the West: Texas. East Texas is as full of cotton as the Mississippi Delta, and you are just as likely to find Baptists and biscuits in Brenham as you are in Birmingham. However, Texas has another quality. The Lone Star State has a food tradition influenced by Tejano culture that predates its admission to the United States. While Greenville, MS has delta tamales, All of Texas is awash in Tex-Mex, that spicy American mixture of Indian and Spanish cuisine that we all love so much.

On second thought, I don’t want to talk about Texas so much-and I certainly could go on for hours-as I want to talk about Tex-Mex food, specifically that delicious concoction, the enchilada. Well, really I want to discuss the enchilada and beer! What could be more delicious than that?

Just what is an enchilada? Well, the word itself can be translated as “chilied.” Tortillas enchiladas are corn tortillas heated in oil and smothered in chili sauce. According to cook book author, Robb Walsh, they were originally served without fillings and topped with white cheese. In West Texas enchiladas are typically served like pancakes in a stack with cheese, onions, and other toppings in between. It is this type of enchilada I want to show you how to prepare.

Everyone knows how to pair spicy Tex-Mex salsa with a cool crisp Mexican lager. I could sit for hours in the Cantina munching and sipping while the football or soccer game drones in the background. Throw in a few good friends and this could become a marathon in a hurry. What many may not realize it that the spicy and pungent flavors of Tex-Mex pair quite well with the spicy, pungent flavors and aromas of American Pale Ale or IPA/DIPA. Like Tex-Mex, the APA and IPA are an American take on foreign recipes that have come into their well-deserved own. So let’s get to pairing one product of cultural diffusion with another!

In this entry, I will walk you through making spicy West Texas enchiladas as well as a well balanced American Pale Ale to compliment your dish.Read More

Shrimp Gumbo


Prep Time:
30 min

Cook Time: 1-4 hours
Serves: 6-8

History
Living in the south, you tend to pick up some classic southern recipes. This recipe is something my wife and I have been tinkering with for a long time. This is the recipe we have settled upon and we think it’s pretty damn delicious. This recipe is great for left overs. Have a lot of random left over veggies and protein? Brew up a batch of delicious gumbo! Anything that crawly, flys, or swims can be tossed into a gumbo.

GumboSmall

Ingredients
4 oz. Vegetable oil
4 oz. All-purpose flour
1 Medium onion diced
3 Stalks of celery diced
1 Green bell pepper diced
3 Cloves minced
2 qt. Low Sodium chicken stock (if using shrimp or crawfish stock, use 1 qt chicken and 1 qt other)
2 Chicken bouillon cubes
1 Can seeded and chopped tomato (not drained)
½ tsp. Black pepper
¼ tsp. Cayenne pepper
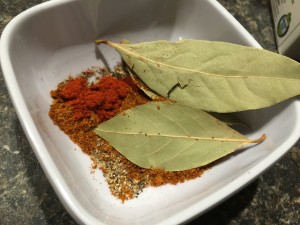
3 Bay leaves
2 tsp. 30% Less sodium old bay
¼ tsp. Smoked paprika
1 lb. Andouille sausage
1 tsp. File powder
1 lb. of peeled and deveined shrimp
Salt
Pepper


Cooking InstructionsPhoto Nov 02, 6 05 54 PM

  1. Place a Dutch oven over medium heat.
  2. Add the oil and flour and mixing using a whisk.
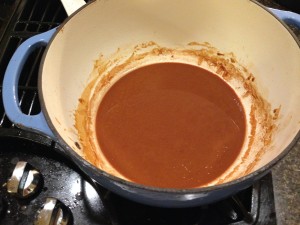
  3. Cook the roux until the roux reaches a peanut butter or red brick color. If any black flecks are formed during thiPhoto Nov 06, 4 01 34 PMs stage, throw the roux out and start over. The roux has burned.Photo Nov 06, 4 05 04 PM
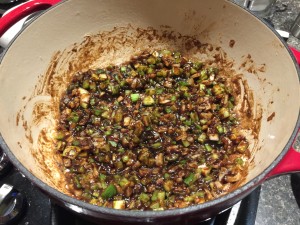
  4. Add the onions, celery, and green bell peppers.
  5. Sauté the vegetables until they are translucent.
  6. Add the garlic and sauté for about 30 seconds.
  7. Slowly add the chicken broth while whisking.
  8. Add the bouillon cubes, tomatoes, black pepper, cayenne, bay leaves, old bay, and smoked paprika.
  9. Cut the andouille sausage into ¼ inch thick disks.
  10. Brown the sausage in a separate pan.
  11. Add the sausage to the gumbo.
  12. Simmer the gumbo for 30 min to 3 hours over low heat. The longer the better.
  13. 30 minutes before serving, add the shrimp.
  14. Taste for salt and pepper.
  15. Serve your gumbo over white rice.


Notes
This recipe is just so damn delicious. Serve it over white rice or do like in some places in Louisiana and serve your gumbo over grits. There are also a lot of parts of this recipe that can be tinkered with.

First, the roux is the hardest part of this recipe, but is the keystone to this recipe turning out. I personally like the very dark roux (brick in color), but it is very difficult to pull off without burning it. However, starting the roux on the stove top and then finishing it in the oven makes things a little easier.

Make the roux as directed in steps 1 and 2. After the roux has been started, toss the uncovered Dutch oven into a 350º F oven. Stir the roux every 15 minutes or so. Pull the roux out of the oven when it has reached your desired level of doneness. Alton Brown has a very good video describing this method, so I recommend checking it out.

Gumbo’s can be cooked with a large variety of different proteins. You can put chicken, beef, duck, crab, or any meat you can think of into a gumbo. A gumbo can contain anything that “walks, crawls, swims, or flies.” You’ll want to brown any protein that isn’t seafood before you add it to the gumbo.

You also may have noticed my recipe does not include okra. That’s because I don’t like okra, so we use the file powder instead. However, if you like okra, feel free to toss it in. However, you might want to back off on the file powder to keep the gumbo from getting too thick.

Choose your Stocks

You can also supplement the chicken stick with other stocks. Shrimp or crawfish stocks are great. Crawfish stock is my personal favorite.

To make shrimp stock, start with 2 lbs. of whole head-on shrimp. Use a medium sized shrimp. Peel and devein the shrimp. Toss the heads and shells into a sauce pan large enough to hold all of the heads and shells. Add enough water to cover the heads. Simmer for about an hour and you have shrimp stock.

Photo Nov 02, 4 34 53 PMCrawfish stock is bit different from a shrimp stock and requires a bit more work, but it’s totally worth it. Crawfish yields very little meat per pound of crawfish. You can get a lb. of tail meat from 5 lbs. of crawfish if you are lucky. So for this recipe, you’ll need at a minimum of 5 lbs. of crawfish.
At this point in the recipe, I am going to assume your crawfish have already gone through a boiling process or are left over from a crawfish boil. You can buy frozen boiled whole crawfish sometimes at the grocery store. Frozen crawfish work fine. Just a note, crawfish from a left over crawfish boil are the best option for this gumbo recipe. The juices from the heads and meat just can’t be beat.

Remove the head and shell of the crawfish. Place the shells and heads into a stock pot. I would use the heads and shells from about 3 lbs. of crawfish. I would discard the rest of the shells and heads.

Add enough water to the stock pot to cover all of the heads and shells. Simmer on low until the liquid reduces to about a quart and your crawfish stock is done.

If you are not in the south and can’t find crawfish, you may need to look online for a vender who will ship you live crawfish. Also, even if you are in the south, you will only find crawfish during the spring and the very beginning of summer. Crawfish is seasonal, but you still might be able to find some in the freezer section.


Diacetyl: What the ale is wrong?

2015-10-28 20.23.17The scientific definition of diacetyl is a vicinal diketone with the molecular formula C4H6O2. In simpleton terms, it is a movie theater butter or butterscotch flavor. Yes, I have heard that movie theaters actually are using diacetyl when they ask you if you want your popcorn buttered. Is this fact? I’m not saying no, but I wouldn’t doubt it. But diacetyl is a common problem in homebrew. I have even had a lot of commercial examples that have loads diacetyl. But this is is not a flaw in some English style beers.

So how does diacetyl get in our beer? Diacetyl is produced during fermentation. It starts to show up in the low krauesen phase. Huh? Low krauesen? This is the phase of fermentation when the yeast has finished growing and you’ll start seeing a foam wreath develop in the middle of the surface. The yeast has not completely adapted to the environment and ready to start metabolizing those sugars you worked so hard to create. Ok, maybe I need to go in depth on the yeast development cycle one day. It is quite interesting what all those yeasts do during fermentation. Back to diacetyl. It can start showing up in the low krauesen phase and the yeast will start cleaning up by products that were developed during late krausen phase.

Ok, so now we know when diacetyl can show up in our beer. Now why am I tasting it in my beer Well, it can be a lot of things.

  • If you have a long lag phase (from when you pitch to when you get to the growth phase of fermentation) which can be caused from poor yeast health or insufficient aeration.
    Some bacteria strains can cause diacetyl production. Here is where I use that sanitation word. Any homebrewer has heard sanitation probably 3.7 million times. Seriously. Sanitation, so that’s 3,700,001 times.
  • Premature racking out of primary. See earlier? You might not be able to see when your beer in late krauesen. So make sure your beer is done fermenting by checking your final gravity for a couple days straight to make sure your gravity is not dropping.
    Under pitching. Huh? So you’ve never made a yeast starter? You’ll improve your beer ten fold by making yeast starters. Take the plunge, get a stir plate and you can make sure you’ll have enough yeast to pitch.
  • Too much oxygen. Wait one minute. I bet you remember me mentioning earlier about insufficient aeration? Well of course I did, there can also be too much. Yeast absorb all the oxygen it can during the growth phase. Well if there is too much oxygen there will still be oxygen lingering when the fermentation is over. Most homebrewers don’t filter their beer. If there is still oxygen left over, the yeast will still be feeding off of it and still trying to go through fermentation phases. Also minimize oxygen exposure after fermentation started, e.g. while racking to the keg or bottling bucket.
  • Increase your fermentation temperature. That is use a diacetyl rest. A diacetyl rest is a common practice for lager beers. When you warm up the yeast it becomes a bit more active and it will help clean up the yeast. You can also use a diacetyl rest for ales, but most of the time you are fermenting at the correct temperature for the diacetyl to be cleaned up.
    Use a less flocculant yeast strain. Flocculation is the state of yeast of being clumped together and falling out of solution. If the yeast is still in suspension it will be a little more efficient when cleaning up diacetyl.

Diacetyl will most of the time be a flaw in lagers, but not in every ale style. It is acceptable in a Czech Pale Lager, English and Scottish style beers and also a dry stout.

I’m sure we have all had this problem show up in our beers. This is one of the major issues that I fight with, especially since I started doing lagers.

Relax, don’t worry, have a homebrew.

References:
How to Brew by John Palmer
Beer Judge Education Course

Originally posted on I Make Wort.

Tips and Tricks for brewing up a Berliner Weisse or Quick Sour Ale

Authors: Ron Unz and Jeremy Wickham
There are several things you need to brew the perfect Berliner Weisse. You need to chose a bacteria strain, control your fermentation temp, oxygen rates, and the amount of hops in your beer. By managing these four things, you are on target for a great berliner wiesse. Unlike other beers, the bugs in a Berliner Weisse don’t care much for standard conditions. So lets just jump right into some of the specifics of setting up the perfect atmosphere for souring up your beer.

Lactobacillus Strains

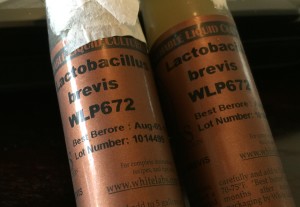
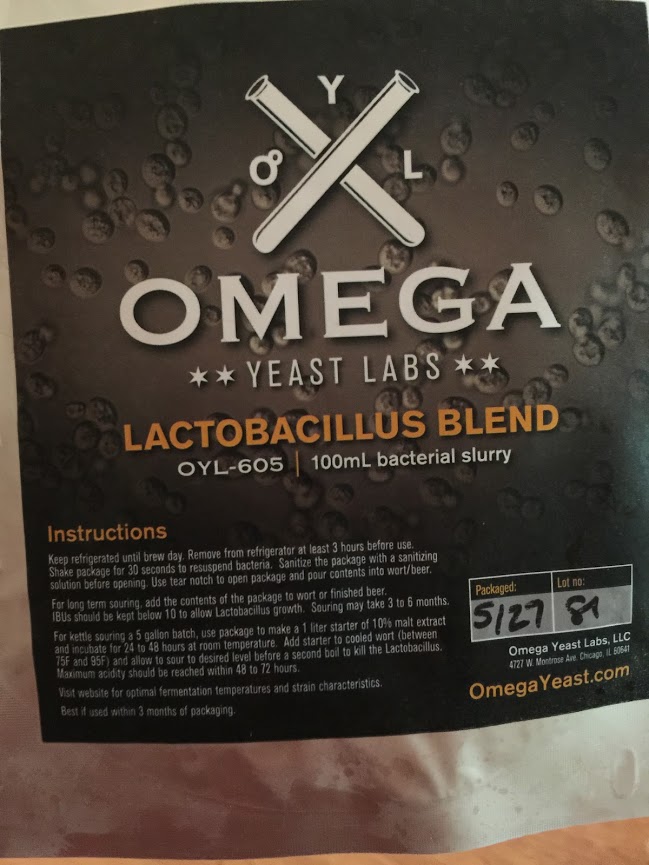
There are three primary lactobacillus strains available to homebrewers that can be used to brew a Berliner Weisse or quick sour an ale. Lactobacillus delbrueckii, lactobacillus brevis, and lactobacillus plantarum. Delbrueckii and Brevis are ones you are most likely to encounter during your adventure into brewing Berliner Weisses. The Berliner Weisse blend made White Labs is made with Delbrueckii and a Sacc. strain. Brevis and Delbrueckii are available through white labs separately. Some yeast vendors are starting to come out with blends that contain brevis. Plantarum usually isn’t found at your homebrew store, but it is known to be used as a probiotic, so you can pick this up online or at your local health food store relatively easily. You maybe able to plantarum from yogurt or other food product that contains it as a probiotic. Wyeast does distribute a lactobacillus buchnire strain, but we are not familiar with working with that particular strain.

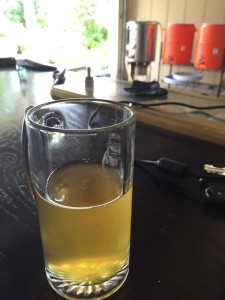
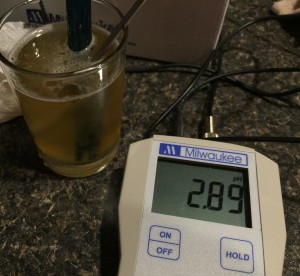
Personally, brevis and plantarum are the strains of lactobacillus we would recommend folks using in their Berliner Weisses or quick soured ales. Brevis and plantarum work very well and quickly in fresh warm wort. We haven’t had much success using delbrueckii, so we would recommend avoid using it or blends where delbrueckii is the only strain of lactobacillus. If a blend has delbrueckii and another quick acting strain, go ahead and use it; just know that the tartness in the beer is most likely not coming from delbrueckii. Brevis and 2015-10-29plantarum also work very quickly, usually with in 24 hours to give the beer a very strong tartness. Usually a pH of 3.5 can be reached with in 24 hours. Both strains produce citrus-like flavors and provide a relatively clean sourness.
Fermentation/Sour Wort Temperatures

Lactobacillus doesn’t like being kept cool. Most strains prefer being kept between 90° F to 110° F. Wort tends to sour more quickly the higher the temperature. Staying within this temperature region for 24 hours is generally long enough for beers containing lactobacillus to reach their minimum pH, usually around 3.4-3.5. If you don’t want to beer to be aggressively sour, you can ferment at cooler temperatures for 24 hours then pitch the yeast you plan on using to complete fermentation. We recommend pitching lactobacillus at warm temperatures (above normal ale yeast tempeatures, 90-110° F) and then cooling to ale temps after 24 hours and then pitching your favorite ale sacc. strain. We’ve had good luck using European Ale Yeast (WLP011) and US-05 in our berliner weisses.

Oxygen Pickup

Oxygen is your worst enemy when working with lactobacillus. You are almost in a tough place when working with lactobacillus. Lactobacilllus doesn’t like oxygen, but your standard brewing yeast does. However, in the presence of oxygen, there are many off flavors and aromas that can occur.

  • Acetic acid - think of how your standard white vinegar tastes. Although acetic acid in a Berliner Weisse is inappropriate for the style, it can be present in low levels in other sour ales such as a Flanders Red.
  • Butyric acid - you remember in college when you drank too much and here comes the McDonalds you ate after you left the bar? Yeah, that’s what butyric acid is. That is a flavor and aroma compound you do not want showing up in any style of beer.
  • Isovaleric acid - when you smell this beer you instantly want a plate of spaghetti. Not really, but with this compound it can smell like Parmesan cheese or some stinky feet that just got back from the gym.

Photo May 09, 11 52 20 AMWhen you are done boiling your wort for your sour ale, you do not want to oxygenate your beer. You want to transfer your wort from your kettle to your fermenter as carefully as possible. Some splashing is ok, but excessive amount could induce too much oxygen. If you are going to keep the wort in the kettle and kettle sour your beer, you will want to flush the wort and head space in your kettle with CO2 or nitrogen and then seal the lid by applying some tape or plastic wrap around the edge of the lid. You want to make the kettle sealed and full of CO2 or nitrogen.

One things we have both forgotten to do at some point while brewing up our first batches of Berliner Weisse is keeping the airlocks full. If you are letting the beer sit in primary for a long period of time and you let the air lock run dry, you run a very high risk of letting some of that lactobacillus produce some acetic acid. So, keep those air locks full!

Hops and Hoping Rates
Lactobacillus hates hops. Lets say this one more time, lactobacillus HATES hops. Most recipes call for 3-5 IBUs of bitterness in the boil. We find this to be too high for lactobacillus. Hops really are effective at keeping lactobacillus at bay, so you don’t want very much in your beer. We highly recommend going with no hops in your Berliner Weisse. Who can taste 5 IBUs of bitterness? The reason most recipes have hops noted is so they follow the Reingeitsgebot. If we had to guess, just about no one, so we just skip adding hops all together. However, what if you want hop flavor in your sour ales? Well, the best solution to that is to blend with a hoppy beer or dry hop your sour ales. A dry hopped Berliner Weisse/sour ale is quiet refreshing and the acidic character often times brings new notes to hops to the surface that you wouldn’t have noticed in a regular beer.

Levels of pH

Having a pH meter is not necessary for brewing up a delicious sour ale. However, they can be very useful in the fermentation process. Pitching rates, temperatures, and the type of wort the lactobacillus is pitched in can have an affect on how long it takes for lactobacillus to drop the pH of your beer. Having a pH meter gives you another tool to dial in your process and give you more control over how sour your beer is. Say for example you just want a slightly tart beer. Well you can let lactobacillus do it’s thing until you hit a pH of 3.6-3,7, then cool to your normal ale fermentation temps, and let the yeast finish off the sugars. Your pH will drop a little bit from the fermentation process, but you’ll be left with a tart beer and not a crazy sour beer. On the other hand, you can monitor the pH of your beer until it reaches its terminal pH and then ferment your yeast. A pH meter just gives you the ability to have more control of your fermentation process. We will be having a future post about how to measure pH and go about maintaining pH meters.
For deciding how far to take the pH with your sour beer, you need to know what pH gives you specific level of sourness. We have provided some basic numbers below.

  • Photo Jun 23, 6 12 48 PM4.5-3.9: Imperceptible
  • 4.0-3.6: Perceived brightness to the beer. This is a great pH range for brightening up a fruit beer.
  • 3.5-3.4: Good level of tartness. Appropriate range for a Berliner Weisse
  • 3.2-3.3: Very sour
  • 3.1-3.0: Extremely sour
  • Less than 3.0: Will dissolve your teeth (joking). A pH and below 3.0 is for the hardcore sour ale drinker. Be sure to take your antacids.

If you are kettle souring, it is highly recommended to reduce the pH of your wort to 4.5 before letting your wort sit for a long period of time and boiling for the second time. You are limiting the types of bacteria that can thrive in wort by reducing the pH to 4.5. This will help keep the beer cleaner and keep unwanted critters from settling in. You can find lactic acid solutions (usually 88% by weight) at your local homebrew store. Just add small amount of this solution (start with 1 ml at a time) until your pH falls to 4.5. Then pitch your lactobacillus and you are ready to go.

We have a particular method for checking the pH of our sour wort. (Note: we always remove samples of the wort and measure the pH of the removed sample. We never check the pH of the wort by sticking the probe into the fermenter, doing so is a pathway for cross contamination.) For our sour ales, we typically remove about 6-8 oz of wort from the fermenter and place it into a sanitized pint glass. For all intents and purposes, we assume the wort in the fermenter at this point is homogeneous and the removed sample is a good sample of the wort in the fermenter. We measure the pH of the sample in the pint glass. Rinse probe with water and stick it back into its storage container. Then cover the pint glass with plastic wrap and keep it next to the fermenter so they are maintained at the same temperature. Do not pour this sample back into the fermenter. When it comes time to check the pH of the wort again, We just remove the plastic wrap and measure the pH again in the pint glass. The pH of the wort in the pint glass should be the same as the wort in the fermenter.

Special Equipment

Lactobacillus likes to hide in all of nooks and crannies of brewing equipment. It’s important that you have a duplicate set of any equipment that is made of plastic (example: racking canes, bottling buckets, carboy caps, air locks, etc.). Lactobacillus can be extremely difficult if not impossible to remove from slightly scratched plastic surfaces. If you don’t want to keep separate pieces of equipment, use equipment that is made of stainless steel or can be safely boiled without damaging the specific piece of equipment. We have boiled pieces of equipment like carboy caps to pasteurize with good success.


Brewing A Berliner Weisse

OPhoto May 01, 5 57 54 PMk, so we gave you a crash course on the basics of brewing a Berliner Weisse, so lets go through the whole process from start to finish real quick.

  1. You’ll need a wort that is around 1.030-1.035 OG that is roughly 50% continental pilsner and 50% white or red wheat. If you are an extract brewer, you’ll want to use a 50/50 mix of pilsner and wheat malt extracts.
  2. The boil
    1. If you are doing all-grain, boil for 90 minutes to drive off any dimethyl sulfide. If you’d like to experiment, you could look into doing a no-boil Berliner Weisse.
    2. If you are doing extract, bring your wort to a boil. You do not need to boil more than a few minutes.
  3. Chill your wort to 110° F.
  4. Carefully, without splashing, Transfer to a glass carboy or stainless fermenter. You can use a plastic bucket, but don’t use this bucket for anything other than Berliner Weisse or other quick sour ales and don’t leave it in there for more than a few weeks.
  5. Pitch Lactobacillus and maintain the fermentation temp above 90° F.
  6. After 6 hours, remove 6-8 oz from the fermenter (use a dedicated wine thief) and measure the pH.
  7. Check the pH every few hours. When the pH hits 3.5-3.6, move the beer to a cooler location so the beer can come to friendly ale fermentation temps. Assume the pH will fall to the desired 3.4-3.5 range during the cooling process.
  8. Once the beer has cooled to about 70° F, pitch your favorite ale yeast (WLP011 is the most traditional).
  9. Ferment for two weeks.
  10. Package as a normally fermented beer, but be sure to use your dedicated/separate sour ale transferring equipment.


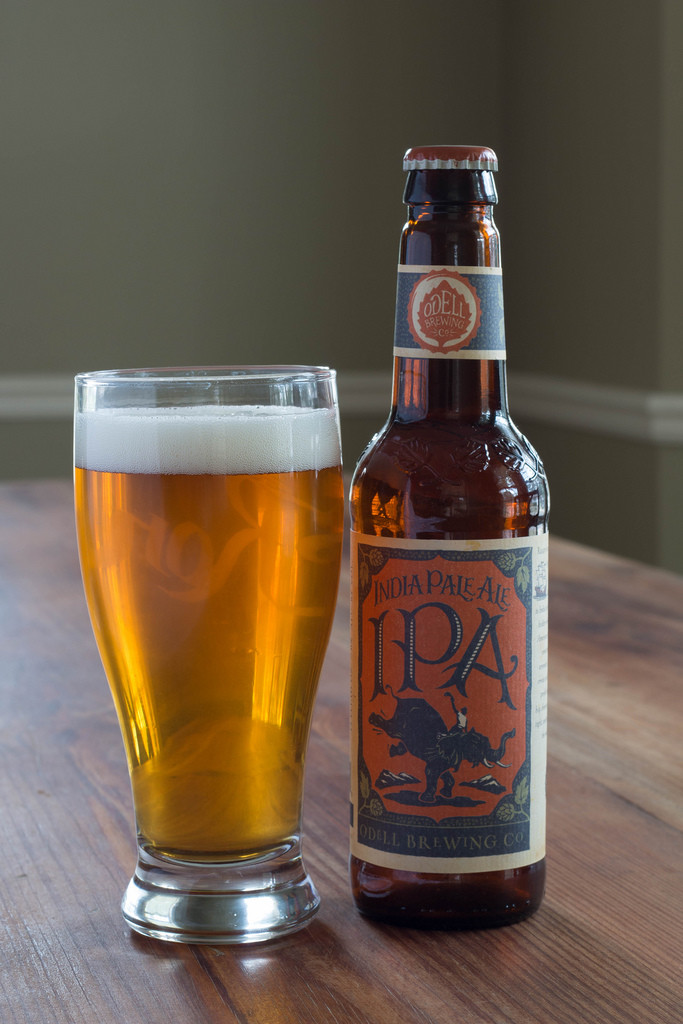
BJCP Scoresheet - Odell IPA

OdellIPAEntry: 003
Judge: Ron Unz
BJCP ID: F0711
Rank: Certified
Beer Name: Odell IPA
Category: 21A - American IPA
Special Ingredients: None
Bottle Inspection: Ok.
Comments: None:

Aroma: 8/12

Moderate-low caramel malt sweetness. Moderate floral hop aroma with moderate-low citrus notes. No fruity esters. No diacetyl.

Appearance: 3/3

Depp gold in color. Very clear. Tan head with tiny tight bubbles. Good head retention.

Flavor: 15/20

Moderate-low caramel up front, slightly too high for style. Citrus and pine hop flavor, moderate. Moderate-high bitterness. Clean fermenation. No fruity esters. Malt is moderately sweet. Slightly cloying. Balance is a little on the sweet side. Bitterness and sweetness follow into the finish.

Mouthfeel: 3/5

Medium-full body. Medium carbonation. No warmth. Low astringency in the finish.

Overall Impression: 8/10

Hop flavor is appropriate for style. Hop aroma could be a little higher for style, increasing carbonation sightly should help. Residual sweetness is too high for style. The sweetness also leads to a body that is too full for style. Caramel flavor is also borderline high. Back off malt by 10%-20%. Overall a very good beer. Great hop flavor.

TOTAL: 37/50

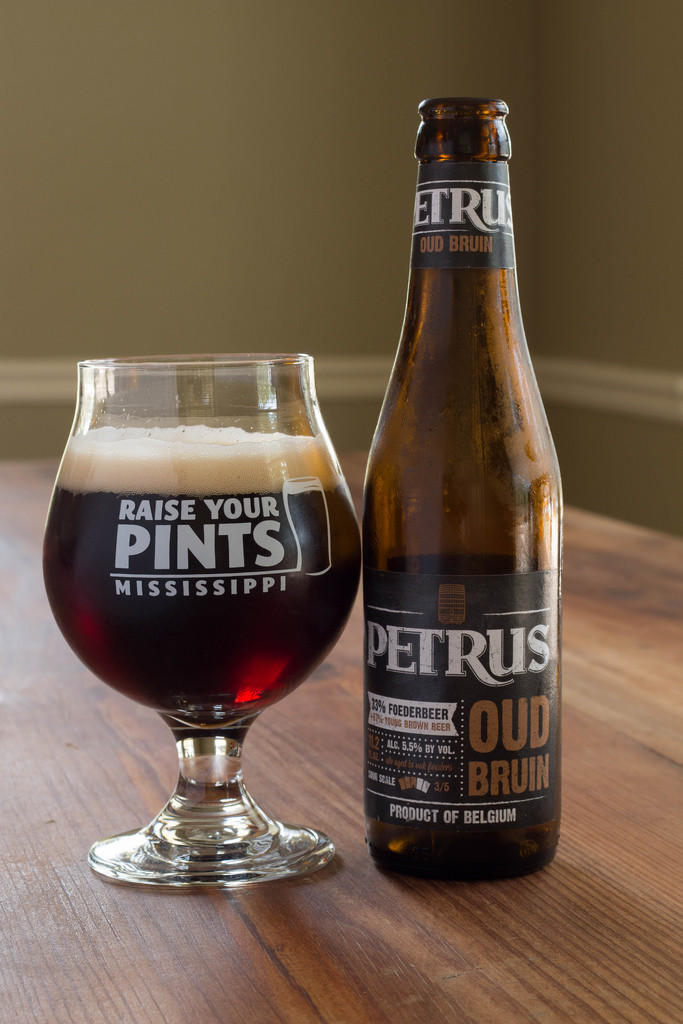
BJCP Scoresheet - De Brabandere Petrus Oud Bruin


19454445840_e413f3d35e_b
Entry:
002
Judge: Ron Unz
BJCP ID: F0711
Rank: Certified
Beer Name: De Brabandere Petrus Oud Bruin
Category: 23C - Oud Bruin
Special Ingredients: None
Bottle Inspection: Ok.
Comments: None

Aroma: 9/12

Upfront sour aroma. Moderate notes of blackberries and dark cherries. Low malt sweetness. Sour notes are moderate-high. Malt aroma improves as the beer warms. No diacetyl.

Appearance: 3/3

Very dark ruby color. Very clear. Tan head with tiny bubbles. Great head retention.

Flavor: 17/20

Moderate-low bready malt flavor. Low caramel malt sweetness. No hop flavor. Low bitterness. Moderate-low tartness. Very bright. Moderate-low notes of plums, figs, and tart cherries. Balance is semi-dry. Very low sweet fig flavor lingers into the finish. Fruit character intensifies as the beer warms. No diacetyl.

Mouthfeel: 5/5

Medium body. Medium-high carbonation. Some what tingles the tongue. No warmth. No astrongiency.

Overall Impression: 9/10

The malt aroma and flavors were a little low, especially in the aroma. The malt flavor was more prevalent and more appropriate to style. Sourness was more pronounced in the aroma and could very well be masking the malt aroma. Tartness level is perfect. Over all a very solid beer. Increase the malt every so slightly for both flavor and aroma.

TOTAL: 43/50


Comments: I am usually not a huge fan of oud bruin. I have always found them kind of ‘meh’. I have had both Liefmans’ version of the oud bruin and I was not impressed with them either. This is by far the best oud bruin I have ever had. I am very impressed with it. It has enough complexity in the aroma and flavor to compete with some of the other sour ales, such as flanders red.

BJCP Scoresheet - Westbrook Gose


WestbrookGose
Entry:
001
Judge: Ron Unz
BJCP ID: F0711
Rank: Certified
Beer Name: Westbrook Gose
Category: 27 - Historical Beer: Gose
Special Ingredients: None
Bottle Inspection: Ok.
Comments: None

Aroma: 8/12

Moderate sour aroma. Low bread crust-like aroma. Low coriander. Low levels of floral notes. No hops. No esters. No diacetyl.

Appearance: 2/3

Hay in color. Hazy, but ok for style. White heat with large bubbles. Poor head retention.

Flavor: 14/20

Moderate-high sourness. Moderate-low levels of salt. Almost reminds me of salted buttermilk. Moderate-low bread and bread crust malt flavor. No hops. Low bitterness. Very low levels of coriander. Balance is dry. Sourness follows long into the finish. Sourness comes off like lemon juice.

Mouthfeel: 4/5

Moderate-low body. Moderate-high carbonation. Sourness make my jaw clench. Heartburn is also felt.

Overall Impression: 8/10

Great beer, but the sourness is almost too intense for the style. The sourness is so intense it is masking the malt and coriander. Back off a little on what ever method is used to sour. I would also like to see a bit more coriander in the flavor and aroma. It’s a little too low for style. Other wise, this is a great summer ale.

TOTAL: 36/50

Rosemary Cream Biscuits

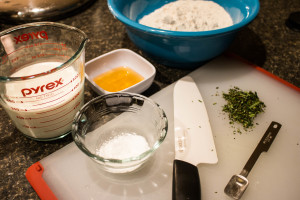
Round1Discoloration-2There isn’t a single traditional home in the south where biscuits aren’t a staple. We don’t make biscuits a lot in our house due to our busy schedules, but we do like to make them about once a week. This recipe is a quick cream biscuit recipe that can be easily whipped up in minutes. This minute is great on those nights you want a biscuit with your meal, but don’t want to spend a lot of time making them.

Round1DiscolorationPrep Time:
5 min
Cook Time: 18-20 min

Ingredients
1 tbsp. fresh finely minced rosemary
2 cups all-purpose flour
3/4 tsp. salt
2 tsp. baking powder
1.5 cups heavy cream
3 tbsp. honey


Steps

  1. Preheat your oven to 425°F
  2. Whisk together the rosemary, flour, salt, and baking powder in a large bowl.
  3. Add the heavy cream and honey.
  4. Mix with a spoon until just about everything is roughly incorporated.
  5. Flour a flat working surface.
  6. Place the dough on the work surface and kneed the dough until everything looks uniform.
  7. Roll the dough out until about 3/8 of an inch thick.
  8. Cut out the biscuits in any shape you want. I tend to just free style them. You just want them rought all the same size so they cook evenly.
  9. Place the biscuits on a greased baking sheet.
  10. Bake for 18-20 minutes.
  11. Place the biscuits on a cooling rack and then consume.

These biscuits are super easy and super delicious. If you don’t want the rosemary in the biscuits, then take it out. The biscuits will still be delicious. I absolutely love making these to have with my biscuits and gravy. The rosemary compliments sawmill gravy so well.

Measuring pH and pH Meter Maintenance for Homebrewers

Author: Ron Unz

The pH during the brewing process can be pretty important, especially if you are interested in repeatability. One of the most common applications for the use of a pH meter is during the mash. Having the mash pH in the appropriate range can greatly increase your mash efficiency. A pH meter is also very hand while brewing a sour ale, making a sour wort, or even a sour mash. A pH meter is a device that essentially measures the hydrogen concentration of a solution. The lower the pH, the more acidic the solution is.

Devices for Measuring pH

In homebrewing, there are two primary methods for measuring pH. The first method utilizes pH strips that require estimating the color of the strips after its dipped into the wort or whatever solution you want to know the pH of. These strips are not very accurate and require you interpret and extrapolate the colors on the bottle or chart that came with the strips. The color of the wort can also interfere with interpreting the color on the strip. I do not recommend these strips being used in a homebrewery.

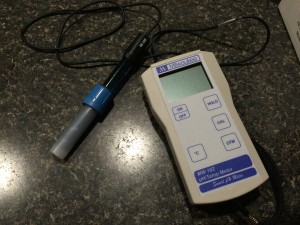
Photo Jun 17, 7 20 23 PMThe second method of measuring pH is using a pH meter. This is the preferred method of measuring pH. Meters can range in price from $15 to thousands of dollars. A $13 model can be found here, but reviews among the homebrewing community are that these can act a bit wonky at times. Two highly recommended pH meters in the brewing and wine making circles are the Milwaukee MW101 or MW102 pH meters. I would recommend the MW102 model because it comes with a thermometer and has built in automatic temperature compensation (ATC). Inexpensive pH meters require the solutions to be at room temperature before measuring the pH. Measuring the pH of a solution is temperature dependent, so having ATC is useful at elevated temperatures, like in the mash.
A third method for measuring pH has recently come to the hombrewing market. This devices has typically been reserved for laboratory. The third method is using a colorimeter or photometer system. This devices requires you to add a small amount of the liquid you wanted tested into a small chamber and then adding a small amount of reactive chemicals. The colorimeter or photometer then measures the color of the solution to determine its pH. These devices are usually very expensive, but can also perform a large range of tests beyond measuring pH. A homebrew photometer system can be picked up for about $300 from Industrial Test System. However, these systems aren’t very useful for solutions that aren’t clear, have color, or contain particulate matter, such as a wort or grist. These devices are most useful for measuring your water chemistry.

PH Meter Maintenance and Care

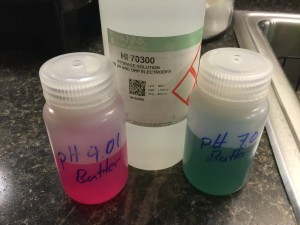
Photo Sep 24, 6 06 26 PMYou will also need to purchase three (two if your pH meter only has a one-point calibration) different solutions to maintain your pH meter. The first one or two solutions you will need are called buffer solutions. These are used to calibrate your pH meter. Most pH meters will require at least a two-point calibration. Usually the pH meter will want to be calibrated with solutions with pHs at 4.0 and 7.0. Calibration buffer solutions are relatively inexpensive and will last a homebrewer a relatively long time. Carefully read the instructions that came with your meter to learn how to perform the appropriate calibration procedure. Note: The buffer solutions can also be used as a quality control check on how well your pH meter is functioning.
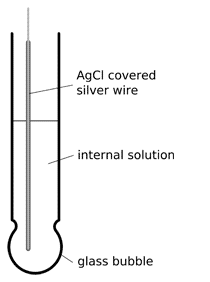
This is a caption
Diagram of pH probe. Source

The third solution is for maintaining the functionality of your pH probe. The probe on a pH meter is a sensitive glass probe . The probe of a pH meter is usually constructed of a thin special glass membrane and there is a conductive fluid inside the pH probe. This probe can easily dry out if the pH probe is not kept in a storage solution. Storage solutions (usually a potassium chloride solution) are relatively inexpensive, and like the buffer solutions, should last a very long time. You don’t need much solutions at any given time. All meters will come with a method for keeping the probe submerged in the storage solution. Usually a cap or small container is filled with the storage solution and the probe screws directly into the container. You want to keep the probe moist during storage. You can use the buffer solutions in place of the storage solution if you are in a pinch. Tap water can also be used, but a normal storage solution or buffer solution would be better. Do not use distilled water as a storage solution as this could permanently damage the probe.

When you are done using your probe, it’s important to rinse the probe. Any material clinging to the probe can easily be transferred to your storage solution. Over a long period of time this could interfere with your probes functionality. I always rinse my probe immediately after using it. I rinse with tap or distilled water.

Over time, there is the possibility of the probe getting gunky. You will be sticking it in some sticky and protein rich solutions, so it’s good to give your probe a good cleaning every now and then. A dirty probe can give very slow or erratic readings. Soaking probes in new clean storage or buffer solution is sometimes enough, but sometimes you’ll need something a bit stronger to get them clean. For a deeper cleaning, procure some 0.1 M hydrochloric acid and soak the probe for about 15 minutes and rinse with water. If your probe is very dirty, you can try to soak the probe in water with a tiny bit of dish soap and then use a soft bristled toothbrush to try and brush any contaminants away. If these methods do not resolve problems with the probe, you might want to consider purchasing a new probe. Also, be sure to rinse out your storage containers occasionally.

Measuring pH

There are several times during the brewing process where knowing the pH is useful. The primary process where pH is most important is during the mash. Mash pH should range from 5.0 to 5.8 with a sweet spot of 5.2-5.4, depending on who you ask and which source you reference. To measure the mash pH, remove the probe from the storage container and stick it in the mash. If your pH meter has a separate thermometer for ATC, put it in the mash close to the pH probe. Push the tip of the probe about 2 inches below the surface of the mash. You will see the pH reading drop and eventually reach a value where the reading does not change. Most pH meters have an indicator telling the user when the pH reading has stabilized. If your probe doesn’t have a stabilization indicator, you are pretty close to stabilization when the displayed number on your pH meter hasn’t changed after about 5 seconds. Once you have measured your pH, remove the probe and immediatelyPhoto Sep 20, 5 50 35 PM rinse with water and place the probe back into its storage container.

Most pH meters provide two decimal points on the readout. I never use the second decimal point. I have found that sticking with the first decimal point and rounding to the nearest 0.1 pH has been more than adequate.

The process of checking your pH anywhere else in the brewing process is the same. Place the probe in the solution your are testing, wait for it to stabilize, remove, and rinse. It’s that easy! If you are measuring post-boiled wort or beer, I would recommend removing a sample from the fermenter or keg before taking a reading. Never stick the probe into your fermenters or kegs. pH probes can be a source of cross contamination if you are not careful, so it’s better to remove a sample and measure the pH of the sample.

I hope you have enjoyed this post. If you have any questions of feel that I have missed something important, please comment below. I would love to have some feed back.

Cheers!