Product Review: Blichmann BrewEasy Turnkey 10 Gallon Gas System

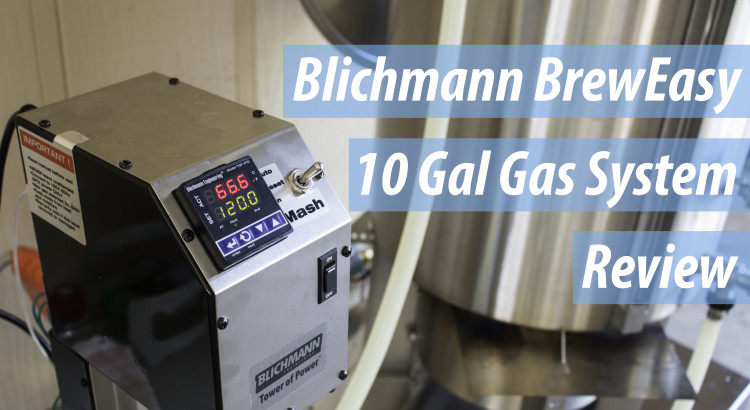
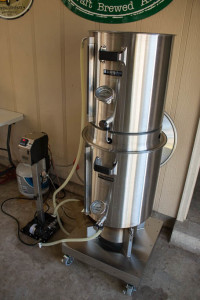
BrewEasyPost-2In this post, I am going to discuss my 10 gallon gas fired Blichmann BrewEasy Turnkey system. You are probably wondering why and the hell I even bought it. Well, I’ve been looking to upgrade my brew system to something more automated for some time now. Nailing my mash temperatures has something I’ve always kind of struggled with. I’m always within about two degrees, but I wanted more control and I wanted to be able to do step mashes as well.

My decision to buy the BrewEasy is based primarily on how lazy I am. This also includes having to design a new system, build it, and then fix the bugs in it. So I wanted to be able to purchase something that was turnkey and would give me the control I wanted. After a lot of research, I settled on the Blichammn Breweasy. The biggest struggle I had when choosing my system was trying to decide on going electric or propane. I choose to go with propane because I like to drag my system around to brew at other locations besides my garage. This route also didn’t require me to have a 240 v GFCI circuit run out to my garage. A local electrician gave me a minor stroke when he wanted $1,600 to run the power I wanted to my garage. I decided to go with the 10 gallon system because it utilizes a 15 gallon mash tun. My previous 10 gallon mash tun was used at capacity pretty frequently, so I wanted something larger. The 15 gallon mash tun will also allow me to do very high gravity beers with 5 gallon batches. So anyway, let’s start discussing the specific components of the system.

Read More

Leftover Ingredients? Brew with Them!

This weekend as I was cleaning my Man Cave (really it’s just a musty basement) I walked by the 5 gallon bucket where I throw all the leftover grain from ingredient orders. You know the deal. Partial bags of specialty malts, some crystal 40 here, black patent there. When I saw the bucket, I thought, I better do something with this before all this goes bad. So I sat down to do an inventory. When you inventory your leftover grain be thinking in terms of recipe. Ask yourself, “If I was reading this list of ingredients in a recipe, what style of beer would I be looking at?” If you have English pale malts and some crystal, for example, you may think, “bitter.” You can brew good bitter with either American or English hops, so don’t worry about pairing it up with English hops only. If you are looking at a bunch of Vienna malt (like I was) you may think something along the lines of a Vienna lager (or a faux lager with neutral ale yeast) or some other toasty malty beer.

I had a lot of Vienna, but I had no Munich with which to pair it, so the Oktoberfest was out. I had a few pounds of base grains left from previous batches. I saw some Golden Promise, pilsner, 2 row, various crystal malts, and various and sundry other items. I already have 5 gallons of bitter in the beer fridge, and I have been brewing those a lot lately, so I kept thinking. A quick check of the freezer revealed partial hop packets of Warrior, Horizon, and Amarillo. I had a few full packets of Centennial and Simcoe. It should be obvious what my next thought was. . .IPA, of course.

The guys in the brewing class I am teaching with Jeremy had talked about how much they love IPA. A small batch could probably be ready to drink before the 5 class sessions over the next month and a half end. Since I didn’t have quite enough base grain to to a full 5.5 gallon batch, I quickly scaled down to 3 gallons and improvised a recipe. Here is what I came up with:

4lbs 12 oz Golden Promise

1 lb 5 oz Pilsner

8 oz Crystal 15

4 oz Dark Wheat

3 oz Crystal 40

3 oz 2 Row

3 oz White Wheat

0.2 oz Horison 11.5%AA @ 60 minutes

0.2 oz Warrior 16%AA @60 minutes

0.6 oz Centennial 9.5%AA @ 10 minutes

0.6 oz Simcoe 12.5%AA @ 5 minutes

0.6 oz Amarillo 8.2%AA@ Flameout

Mash at 149F for 90 minutes, 90 minute boil, Safale US-05 Yeast fermented at 67F.

That gave me the following specs in BeerSmith: Batch Size-3 gallons, OG of 1.066, IBU-65, FG of 1.012, ABV-7.1%, 7.6 SRM.

What came next was a frenzy of compiling and crushing all the grains and a quick small batch brew day. While I was at it, I had a Super Bowl gathering to attend later in the day, so I decided I’d dry some of my spent grains and whip up some of Jeremy’s Spent Grain Buttermilk Biscuits that he blogged about here earlier. They would go well with a backwoods Super Bowl party.

Be right back after brewing. . .

Well, sometimes the brew gods give, and sometimes they take away. I missed by original gravity on this recipe by a long way. It was supposed to be 1.066, but I ended up at 1.052. I imagine the small batch size and different equipment profile threw off my BeerSmith calculations. Not to worry, it will just be one of those “session ipas” I keep hearing about. In any case, relax, don’t worry, have a homebrew.

My 90 minute boil may not been vigorous enough, but the volume hit pretty spot on. With the early Mississippi February daytime temperature today at about normal at 57F, and night time temps hitting near freezing, my groundwater is pretty cold. I was able to chill this small 3 gallon batch well below 70F with my copper immersion chiller in no time at all (ok. really about 15 minutes). That’s my favorite thing about winter brewing in the South. Quick chilling but still not bone chilling cold on the patio. There is no way you can chill with an immersion chiller and ground water in under 45 minutes or so in summer time here.

Anyway, I went straight to the fermenter, straight away pitched my US-05 yeast, and then straight to the fermentation chamber. The wort smelled fantastic, and it foreshadows a wonderful “session” IPA. I will let you know how it turns out in a couple of weeks.


Stupid Easy Rustic Beer Bread

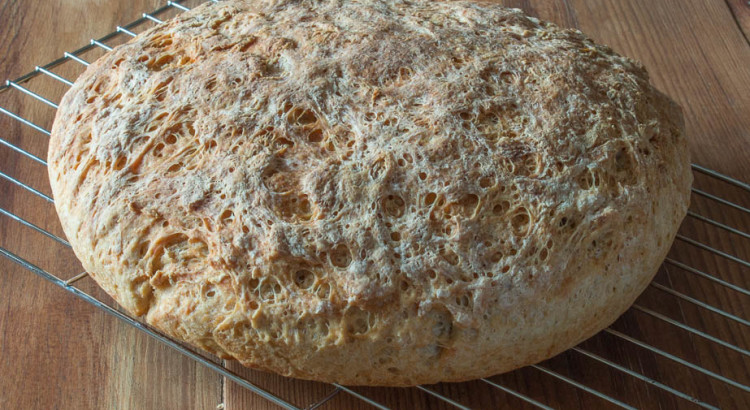
Ok, I love all things bread, but I’m a fatty, so that’s to be expected. My mother recently taught me a rustic beer bread she’s been making for my step father. The recipe was stupid easy and tasts great. This recipe is also very forgiving and requires no kneading. I made some tweaks to the recipe to include beer, specifically homebrew!

RusticBreadThis recipe only calls for four ingredients:

  • 6.5 cups bread flour
  • 1.5 tbsp. instant yeast
  • 1 tbsp. kosher salt
  • 3 cups pale ale

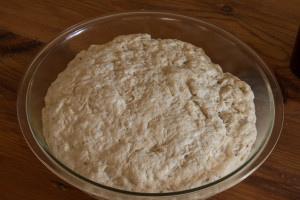
Whisk together the flour, yeast, and kosher salt in the largest mixing bowl you have. Then add the beer. Using a spatula, pull the bread dough together and be sure the liquid is mixedRusticBread-2 throughout. If the bread dough looks too dry, add a splash of water or more beer. You want a moist, pliable dough. It’s ok if your dough looks too wet. Again, this dough is super forgiving, you just don’t want it too dry.

Spray another bowl large enough to hold 2-3 times the volume of your dough with cooking spray. Place RusticBread-3the dough in the bowl and cover with a damp towel and place in warm place (I use my oven with the light on) and let the dough rise for 4-5 hours. The dough should at least double in size, how long it will take to rise will vary.

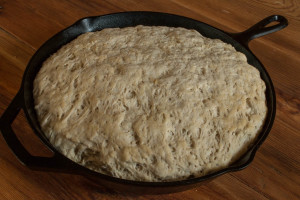
After your dough has doubled in size, carefully transfer the dough to a 9 or 12 inch cast iron skillet. I used a 12 inch skillet for this post. Using 9 inch skillet will give you a thicker loaf. If your skillet is well seasoned, RusticBread-4you shouldn’t need to spray it down with anything. If your skillet isn’t well seasoned, go a head and spray it down with some cooking spray. Let the bread rise another 2-3 hours. Another note, if you want to use loaf pans instead in place of a cast iron skillet, go a head. Just cut the loaf in half and place the two pieces into two different loaf pans.

Preheat your oven to 425° F. Place your cast iron skillet in the oven and bake your bread for 45-60 minutes. RusticBread-5Pierce the bread with a skewer after 45 minutes and remove. If the there is nothing sticking to the skewer, your bread is done. Continue checking the bread every 5-10 minutes until the skewer can be removed cleanly. If you have an instant read thermometer, like a themapen, you can check the bread’s doneness by checking it’s temperature. Cook the bread until the interior temp reaches 210° F.

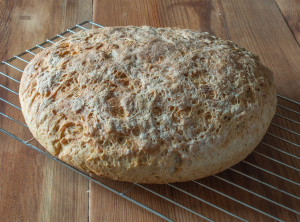
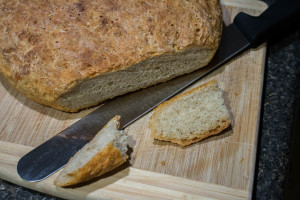
Once your bread is done, remove from the oven and carefully remove from the cast iron skillet. RusticBread-6Place on a cooling rack until the bread is cool enough to handle. Cut the bread up however you’d like and enjoy.

In this recipe, I used pale ale, but you can really use any beer you like. Lighter beers work well and so do hoppy beers. Just about any beer will work. However, I have found that stout and porters do work, but I find that the darker malt flavors clash with the bread and make it almost bitter. Herbs work very well in this bread as well. Rosemary in this bread is fricken awesome. Just chop it finely and add it to your dry ingredients before you add your liquids. It’s that easy.

Hazards in the Homebrewery

Part of my responsibility during my day job is to keep an eye on folks in a research environment and to make sure everyone is doing their jobs safely. I often times find my role of keeping an eye on folks at work bleeding over to my family and personal life. I often see things or situations that are a bit risky and dangerous. This blog was sparked because Wick had a minor accident with a brew hauler and it made me think it was time to remind folks that homebrewing has some risks. Some hazards can cause bodily injuries, damage personal belongings, or ruin your brewday.

Every hobby has their inherent risks. Homebrewing is no different and the hazards range from mundane to potentially life threatening. In this post I will discuss some of the most common hazards you might encounter as a homebrewer. I will go also into detail a little about how to negate these hazards. The goal of this post is to not scare folks, but to remind folks that this hobby does have some hazards. Injuries are rare in homebrewing, but accidents do happen on occasion and it’s best to avoid or at least prepare for them. This post might be a little on the long side, but I feel this topic is important and should be shared. Please share this post with your fellow homebrewers.

Hot Surface and Liquids

Whether you are an all-grain or an extract brewer, you will have no choice but to deal with hot surfaces and boiling liquids. From my experience, burns are the most common type of injury in the home-brewery. Having to boil your wort has its risks. First, surfaces exceeding 140° F can produce second degree burns in approximately three seconds and third degree burns in five seconds of contact. This is usually enough time let go if it’s something you picked up or touched. However, if you were splashed by a hot liquid and it saturated your clothes, it might take a few seconds for you to remove your clothes and an injury can occur. The highest potential for burn injuries is during the boil. The surface of your kettle and the wort inside is at least at 212° F, potentialy higher depending on the sugar concentration. At this temperature, third degree burns are almost immediate if you are splashed with wort or if you touch the kettle or burner.

Read More