Scoresheet Saturday: Sierra Nevada Otra Vez

In this post, I’m sipping on one of my favorite summer beer styles, Gose. The Westbrook Gose is one of my all-time favorite summer beers. Lets see how the Otra Vez tastes and compared to the style guidelines in the BJCP.


Judge:
Ron Unz
BJCP ID: F0711
Rank: Certified
Beer Name: Sierra Nevada Beer Otra Vez
Category: 27 Historical Beer – Gose
Special Ingredients: None
Bottle Inspection: Ok.
Comments: None

Aroma: 7/12

Moderate-low bread crust malt and wheat aroma. No hop aroma. Low levels of citrus and fruit. Moderate-low acidity which lends to a brightness to the aroma. No diacetyl. No coriander.

Appearance: 2/3

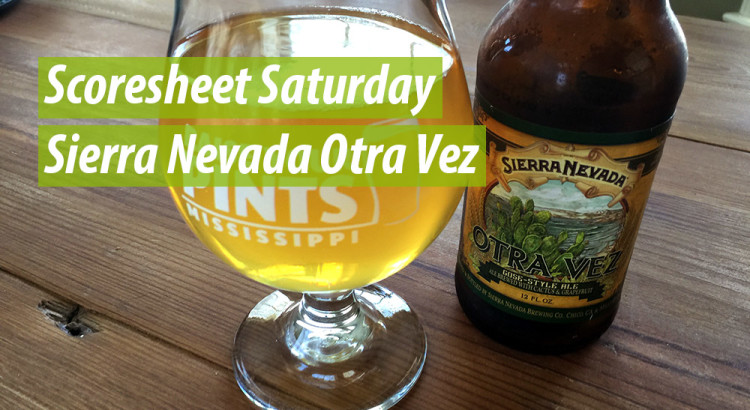
Sierra-Nevada-Orta-Vez-2Dark hay in color. Moderate haze, but ok for style. White head with large bubbles that quickly falls. Poor head retention.

Flavor: 12/20

Moderate-low bread and bread crust malt flavors. Bright citrus up front with hints of lemons and watermelon. Moderate-lower bitterness with no hop flavor. Relatively clean fermentation. Beer is a little on the sweet balance, especially in the finish. Sweetness is slightly cloying. No coriander. Low levels of salt, but ok for style.

Mouthfeel: 4/5

Medium body. Moderate-low carbonation. No astringency.

Overall Impression:
 6/10

I really enjoy the flavors this beer has to offer. The citrus and watermelon-like flavors makes me think this might be better off in a fruit category. This beer is a little sweet for style and is slightly cloying. Mash lower, use some simple sugars, or increase the carbonation. Carbonation is already too low for style The beer also needs a larger more prominent coriander presence. I perceived no coriander. Solid summer ale.

TOTAL: 31/50

Comments: I really enjoyed this beer. Overall I think it’s a little too sweet and cloying for style. The coriander is an important component to a gose. The beer is labeled as a “gose-style” ale, so I was hoping to have a little more coriander. However, the beer is marketed to have pear cactus and grapefruit. I get a hint of citrus, but the pear fruit really comes across as a watermelon-like flavor which is excellent in this style of beer. If this beer was a little drier and/or higher carbonated and had a more coriander, it would have scored in the high 30s low 40s. Now if this were judged in category Fruit Beer (29A), then this beer would have also scored very well. The fruit character is almost perfect because it allows the base beer to shine while still being present.

Scoresheet Saturday: Sierra Nevada Beer Camp Tropical IPA

In this post, I dabble with the newest Sierra Nevada Beer Camp beer. This year, Sierra Nevada is releasing a Tropical IPA with an ABV of 6.7%. This IPA features Citra, Mosaic, and El Dorado hops. Lets dive in and see how this beer compares to the BJCP style guideline as an American IPA.

25536879035_4da909400b_bJudge: Ron Unz
BJCP ID: F0711
Rank: Certified
Beer Name: Sierra Nevada Beer Camp Tropical IPA
Category: 21A – American IPA
Special Ingredients: None
Bottle Inspection: Ok.
Comments: None

Aroma: 10/12

Moderate-high hop aroma with notes of orange, tangerine, pine, resin, with low levels of spice. Moderate-low malt sweetness with no distinct notes. No esters. No diacetyl.

Appearance: 3/3

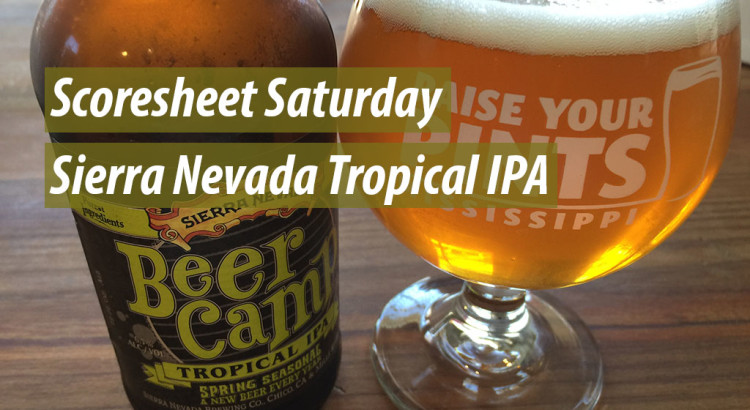
Gold in color. Low haze, but ok for style. Off-white heat with small tight bubbles. Great head retention.

Flavor: 10/20

25418346022_f0be7054c8_bModerate toasty malt flavor with low levels of malt sweetness. Moderate-high dank, pine, resin, and spice hop flavors. Very high bitterness. Low levels of citrus in the finish. No esters or diacetyl. Balance is very hop forward. The finish is dry. The dryness and bitterness produces a very astringent character that lingers for a long time that is harsh, unpleasant, and . The hop flavor comes across as soapy. More citrus and fruity hop character comes through as the beer warms.

Mouthfeel: 3/5

Medium body. Medium carbonation. Moderate-high astringency that lingers for a long time and is unpleasant. No alcohol heat.

Overall Impression:
 5/10

The initial toasty malt profile was exceptional but was quickly over run by hop bitterness. Beer was also fermented well. After two or three sips my palate was destroyed and the malt character was barely perceived. The biterness was astringent and unpleasant. Try experimenting with different hop varieties, back off on the bittering hops, or shift more of the bittering hops to later in the boil. Also, if using tap water, blend with some RO water as some ions and brewing salts can boost perceived bitterness/harshness. More citrus notes do come through as the beer warms, which is nice.

TOTAL: 31/50

Comments: I stopped drinking this beer 10 minutes ago and I can still taste the bitterness. If you like tongue shredding IPAs, this one will do the trick. Just don’t plan on drinking anything else the rest of the evening. The hop aroma is great and I really enjoyed the initial toasty malt character, but that flavor quickly got smashed by the hop bitterness and astringency. Sierra Nevada uses Citra, Mosaic, and El Dorado hops, all of which have pretty prominent citrus/fruit character. For some reason I don’t get much citrus except in the finish and after the beer warms. Other reviews of this beer say the beer has an intense citrus and fruit character with a subdued bitterness. Maybe my palate is jacked today… well, it is now after finishing that beer.

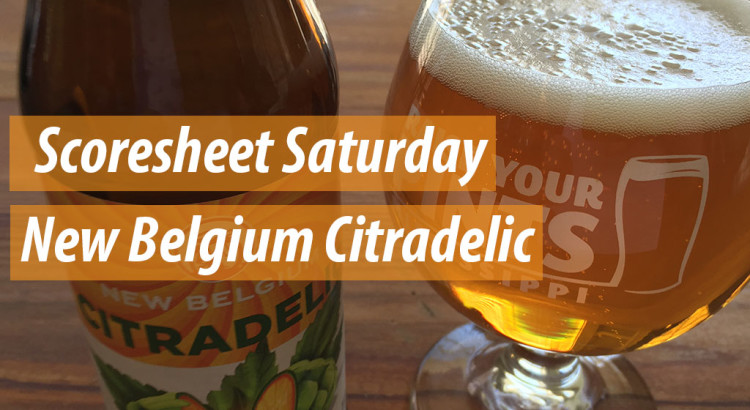
Scoresheet Saturday: New Belgium Citradelic

So, I thought it would it would be fun to add a weekly blog post called Scoresheet Saturday. The goal of these posts is to force us to spend more time studying for the BJCP proficiency exam by regularly writing score sheets and evaluating beers. My goal is to publish one or more score sheets every Saturday. I am hoping my other SFF cohorts join me on occasion in writing score sheets. These posts will also give us an opportunity to receive feedback from each other and other experienced judges. All three of us have scored high enough on the tasting exam to attempt taking the written proficiency exam. However, since we have taken our tasting exams, the BJCP has switched to the 2015 guidelines, so things have changed a bit in terms of judging. To be consistent with what we would experience during an exam or a judging session, we’ll keep to a 20 minute evaluation and writing period. I hope these posts will help you and us prepare for future BJCP exams.

25239356240_47577a21d2_bJudge: Ron Unz
BJCP ID: F0711
Rank: Certified
Beer Name: New Belgium Citradelic
Category: 21A – American IPA
Special Ingredients: None
Bottle Inspection: Ok.
Comments: None

Aroma: 8/12

Moderate hop aroma. Mostly notes of orange and a hint of lemon and tangerine. Moderate-low caramel malt sweetness with hints of toast. Very lower pear-like fruity esters. No diacetyl.

Appearance: 3/3

Deep gold in color. Slight off-white heat with tiny tight bubbles. Very clear. Good head retention.

25239356930_3bc25ac835_bFlavor:
14/20

Moderate orange, lemon, and tangerine hop flavor that gives the beer a boost of brightness. Moderate bitterness. Medium-low malt sweetness with low caramel and toasted bread notes. Very low fruity esters. Balance is slightly leaning toward the hops. Bitterness and tangerine fruitiness followings into the finish. Bitterness sticks around long into the finish, but is not unpleasant. No diacetyl.

Mouthfeel: 5/5

Medium body. Medium carbonation. No warmth. No creaminess. Low astringency.

Overall Impression:
7/10

Very tasty beer with solid citrus/american hop flavor. Very easy to drink IPA. The hop flavors and aroma are within style, but borderline on the upper end of the APA category. If the malt bill was a little smaller, I would consider this more of an APA. I would recommend increasing the hops near the end of boil and/or in the dry hop. Overall a very good beer.

TOTAL: 37/50

Comments: I really did enjoy this beer. I personally feel that this beer almost borders the line between styles. I’d consider the hop profile to be on the very low end of the spectrum for an IPA. I took a look at New Belgium’s website after writing my score sheet and saw they are using citra hopes (not a surprise based on the name) and tangerine peels. The tangerine notes add a bit of brightness I really enjoy. I would recommend to anyone who enjoys a solid hoppy beer.

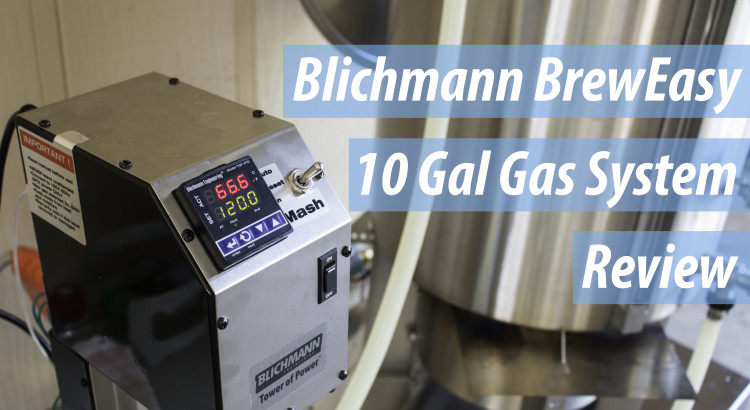
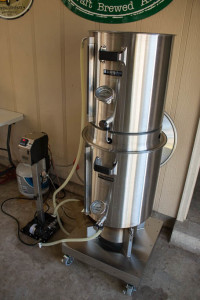
Product Review: Blichmann BrewEasy Turnkey 10 Gallon Gas System

BrewEasyPost-2In this post, I am going to discuss my 10 gallon gas fired Blichmann BrewEasy Turnkey system. You are probably wondering why and the hell I even bought it. Well, I’ve been looking to upgrade my brew system to something more automated for some time now. Nailing my mash temperatures has something I’ve always kind of struggled with. I’m always within about two degrees, but I wanted more control and I wanted to be able to do step mashes as well.

My decision to buy the BrewEasy is based primarily on how lazy I am. This also includes having to design a new system, build it, and then fix the bugs in it.  So I wanted to be able to purchase something that was turnkey and would give me the control I wanted. After a lot of research, I settled on the Blichammn Breweasy. The biggest struggle I had when choosing my system was trying to decide on going electric or propane. I choose to go with propane because I like to drag my system around to brew at other locations besides my garage. This route also didn’t require me to have a 240 v GFCI circuit run out to my garage. A local electrician gave me a minor stroke when he wanted $1,600 to run the power I wanted to my garage. I decided to go with the 10 gallon system because it utilizes a 15 gallon mash tun. My previous 10 gallon mash tun was used at capacity pretty frequently, so I wanted something larger. The 15 gallon mash tun will also allow me to do very high gravity beers with 5 gallon batches. So anyway, let’s start discussing the specific components of the system.

Read More

Stupid Easy Rustic Beer Bread

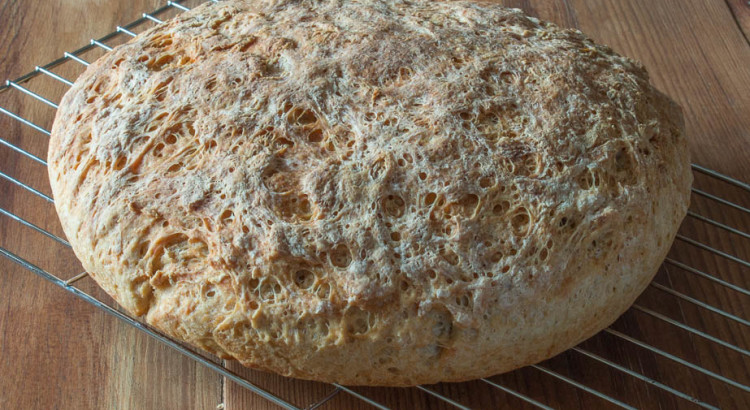
Ok, I love all things bread, but I’m a fatty, so that’s to be expected. My mother recently taught me a rustic beer bread she’s been making for my step father. The recipe was stupid easy and tasts great. This recipe is also very forgiving and requires no kneading. I made some tweaks to the recipe to include beer, specifically homebrew!

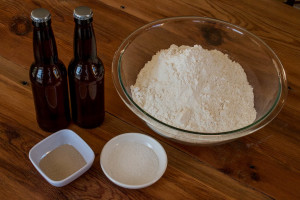
RusticBreadThis recipe only calls for four ingredients:

  • 6.5 cups bread flour
  • 1.5 tbsp. instant yeast
  • 1 tbsp. kosher salt
  • 3 cups pale ale

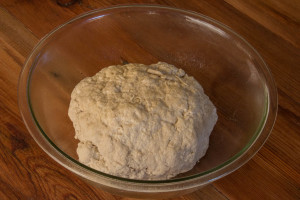
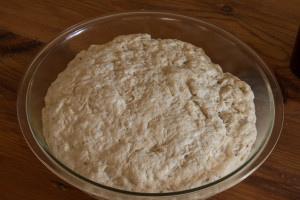
Whisk together the flour, yeast, and kosher salt in the largest mixing bowl you have. Then add the beer. Using a spatula, pull the bread dough together and be sure the liquid is mixedRusticBread-2 throughout. If the bread dough looks too dry, add a splash of water or more beer. You want a moist, pliable dough. It’s ok if your dough looks too wet. Again, this dough is super forgiving, you just don’t want it too dry.

Spray another bowl large enough to hold 2-3 times the volume of your dough with cooking spray. Place RusticBread-3the dough in the bowl and cover with a damp towel and place in warm place (I use my oven with the light on) and let the dough rise for 4-5 hours. The dough should at least double in size, how long it will take to rise will vary.

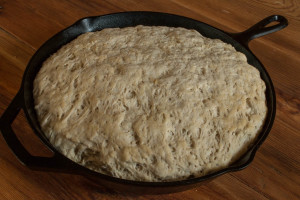
After your dough has doubled in size, carefully transfer the dough to a 9 or 12 inch cast iron skillet. I used a 12 inch skillet for this post. Using 9 inch skillet will give you a thicker loaf. If your skillet is well seasoned, RusticBread-4you shouldn’t need to spray it down with anything. If your skillet isn’t well seasoned, go a head and spray it down with some cooking spray. Let the bread rise another 2-3 hours. Another note, if you want to use loaf pans instead in place of a cast iron skillet, go a head. Just cut the loaf in half and place the two pieces into two different loaf pans.

Preheat your oven to 425° F. Place your cast iron skillet in the oven and bake your bread for 45-60 minutes. RusticBread-5Pierce the bread with a skewer after 45 minutes and remove. If the there is nothing sticking to the skewer, your bread is done. Continue checking the bread every 5-10 minutes until the skewer can be removed cleanly. If you have an instant read thermometer, like a themapen, you can check the bread’s doneness by checking it’s temperature. Cook the bread until the interior temp reaches 210° F.

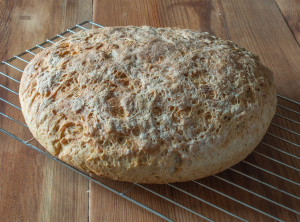
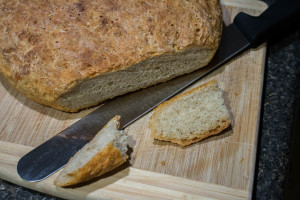
Once your bread is done, remove from the oven and carefully remove from the cast iron skillet. RusticBread-6Place on a cooling rack until the bread is cool enough to handle. Cut the bread up however you’d like and enjoy.

In this recipe, I used pale ale, but you can really use any beer you like. Lighter beers work well and so do hoppy beers. Just about any beer will work. However, I have found that stout and porters do work, but I find that the darker malt flavors clash with the bread and make it almost bitter. Herbs work very well in this bread as well. Rosemary in this bread is fricken awesome. Just chop it finely and add it to your dry ingredients before you add your liquids. It’s that easy.

Hazards in the Homebrewery

Part of my responsibility during my day job is to keep an eye on folks in a research environment and to make sure everyone is doing their jobs safely. I often times find my role of keeping an eye on folks at work bleeding over to my family and personal life. I often see things or situations that are a bit risky and dangerous. This blog was sparked because Wick had a minor accident with a brew hauler and it made me think it was time to remind folks that homebrewing has some risks. Some hazards can cause bodily injuries, damage personal belongings, or ruin your brewday.

Every hobby has their inherent risks. Homebrewing is no different and the hazards range from mundane to potentially life threatening. In this post I will discuss some of the most common hazards you might encounter as a homebrewer. I will go also into detail a little about how to negate these hazards. The goal of this post is to not scare folks, but to remind folks that this hobby does have some hazards. Injuries are rare in homebrewing, but accidents do happen on occasion and it’s best to avoid or at least prepare for them. This post might be a little on the long side, but I feel this topic is important and should be shared. Please share this post with your fellow homebrewers.

Hot Surface and Liquids

Whether you are an all-grain or an extract brewer, you will have no choice but to deal with hot surfaces and boiling liquids.  From my experience, burns are the most common type of injury in the home-brewery. Having to boil your wort has its risks. First, surfaces exceeding 140° F can produce second degree burns in approximately three seconds and third degree burns in five seconds of contact. This is usually enough time let go if it’s something you picked up or touched. However, if you were splashed by a hot liquid and it saturated your clothes, it might take a few seconds for you to remove your clothes and an injury can occur. The highest potential for burn injuries is during the boil. The surface of your kettle and the wort inside is at least at 212° F, potentialy higher depending on the sugar concentration. At this temperature, third degree burns are almost immediate if you are splashed with wort or if you touch the kettle or burner.

Read More

Shrimp Gumbo


Prep Time:
30 min

Cook Time: 1-4 hours
Serves: 6-8

History
Living in the south, you tend to pick up some classic southern recipes. This recipe is something my wife and I have been tinkering with for a long time. This is the recipe we have settled upon and we think it’s pretty damn delicious. This recipe is great for left overs. Have a lot of random left over veggies and protein? Brew up a batch of delicious gumbo! Anything that crawly, flys, or swims can be tossed into a gumbo.

GumboSmall

Ingredients
4 oz. Vegetable oil
4 oz. All-purpose flour
1 Medium onion diced
3 Stalks of celery diced
1 Green bell pepper diced
3 Cloves minced
2 qt. Low Sodium chicken stock (if using shrimp or crawfish stock, use 1 qt chicken and 1 qt other)
2 Chicken bouillon cubes
1 Can seeded and chopped tomato (not drained)
½ tsp. Black pepper
¼ tsp. Cayenne pepper
3 Bay leaves
2 tsp. 30% Less sodium old bay
¼ tsp. Smoked paprika
1 lb. Andouille sausage
1 tsp. File powder
1 lb. of peeled and deveined shrimp
Salt
Pepper


Cooking InstructionsPhoto Nov 02, 6 05 54 PM

  1. Place a Dutch oven over medium heat.
  2. Add the oil and flour and mixing using a whisk.
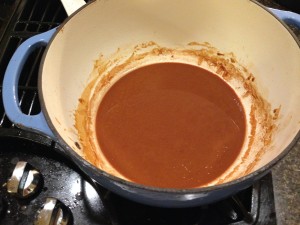
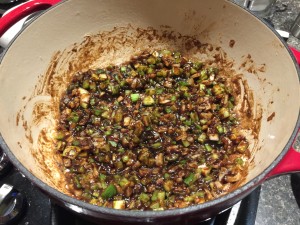
  3. Cook the roux until the roux reaches a peanut butter or red brick color. If any black flecks are formed during thiPhoto Nov 06, 4 01 34 PMs stage, throw the roux out and start over. The roux has burned.Photo Nov 06, 4 05 04 PM
  4. Add the onions, celery, and green bell peppers.
  5. Sauté the vegetables until they are translucent.
  6. Add the garlic and sauté for about 30 seconds.
  7. Slowly add the chicken broth while whisking.
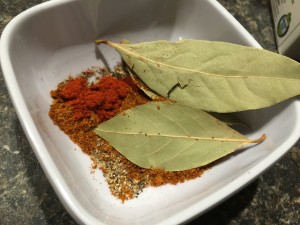
  8. Add the bouillon cubes, tomatoes, black pepper, cayenne, bay leaves, old bay, and smoked paprika.
  9. Cut the andouille sausage into ¼ inch thick disks.
  10. Brown the sausage in a separate pan.
  11. Add the sausage to the gumbo.
  12. Simmer the gumbo for 30 min to 3 hours over low heat. The longer the better.
  13. 30 minutes before serving, add the shrimp.
  14. Taste for salt and pepper.
  15. Serve your gumbo over white rice.


Notes
This recipe is just so damn delicious. Serve it over white rice or do like in some places in Louisiana and serve your gumbo over grits. There are also a lot of parts of this recipe that can be tinkered with.

First, the roux is the hardest part of this recipe, but is the keystone to this recipe turning out. I personally like the very dark roux (brick in color), but it is very difficult to pull off without burning it. However, starting the roux on the stove top and then finishing it in the oven makes things a little easier.

Make the roux as directed in steps 1 and 2. After the roux has been started, toss the uncovered Dutch oven into a 350º F oven. Stir the roux every 15 minutes or so. Pull the roux out of the oven when it has reached your desired level of doneness. Alton Brown has a very good video describing this method, so I recommend checking it out.

Gumbo’s can be cooked with a large variety of different proteins. You can put chicken, beef, duck, crab, or any meat you can think of into a gumbo.  A gumbo can contain anything that “walks, crawls, swims, or flies.”  You’ll want to brown any protein that isn’t seafood before you add it to the gumbo.

You also may have noticed my recipe does not include okra. That’s because I don’t like okra, so we use the file powder instead. However, if you like okra, feel free to toss it in. However, you might want to back off on the file powder to keep the gumbo from getting too thick.

Choose your Stocks

You can also supplement the chicken stick with other stocks. Shrimp or crawfish stocks are great. Crawfish stock is my personal favorite.

To make shrimp stock, start with 2 lbs. of whole head-on shrimp. Use a medium sized shrimp. Peel and devein the shrimp. Toss the heads and shells into a sauce pan large enough to hold all of the heads and shells. Add enough water to cover the heads. Simmer for about an hour and you have shrimp stock.

Photo Nov 02, 4 34 53 PMCrawfish stock is bit different from a shrimp stock and requires a bit more work, but it’s totally worth it. Crawfish yields very little meat per pound of crawfish. You can get a lb. of tail meat from 5 lbs. of crawfish if you are lucky.   So for this recipe, you’ll need at a minimum of 5 lbs. of crawfish.

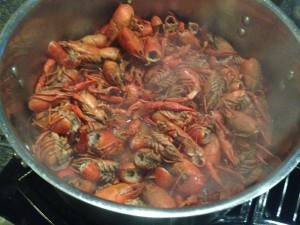
At this point in the recipe, I am going to assume your crawfish have already gone through a boiling process or are left over from a crawfish boil. You can buy frozen boiled whole crawfish sometimes at the grocery store. Frozen crawfish work fine. Just a note, crawfish from a left over crawfish boil are the best option for this gumbo recipe. The juices from the heads and meat just can’t be beat.

Remove the head and shell of the crawfish. Place the shells and heads into a stock pot. I would use the heads and shells from about 3 lbs. of crawfish.  I would discard the rest of the shells and heads.

Add enough water to the stock pot to cover all of the heads and shells. Simmer on low until the liquid reduces to about a quart and your crawfish stock is done.

If you are not in the south and can’t find crawfish, you may need to look online for a vender who will ship you live crawfish. Also, even if you are in the south, you will only find crawfish during the spring and the very beginning of summer. Crawfish is seasonal, but you still might be able to find some in the freezer section.


Tips and Tricks for brewing up a Berliner Weisse or Quick Sour Ale

Authors: Ron Unz and Jeremy Wickham
There are several things you need to brew the perfect Berliner Weisse. You need to chose a bacteria strain, control your fermentation temp, oxygen rates, and the amount of hops in your beer. By managing these four things, you are on target for a great berliner wiesse. Unlike other beers, the bugs in a Berliner Weisse don’t care much for standard conditions. So lets just jump right into some of the specifics of setting up the perfect atmosphere for souring up your beer.

Lactobacillus Strains
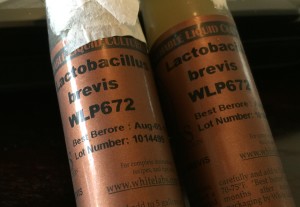
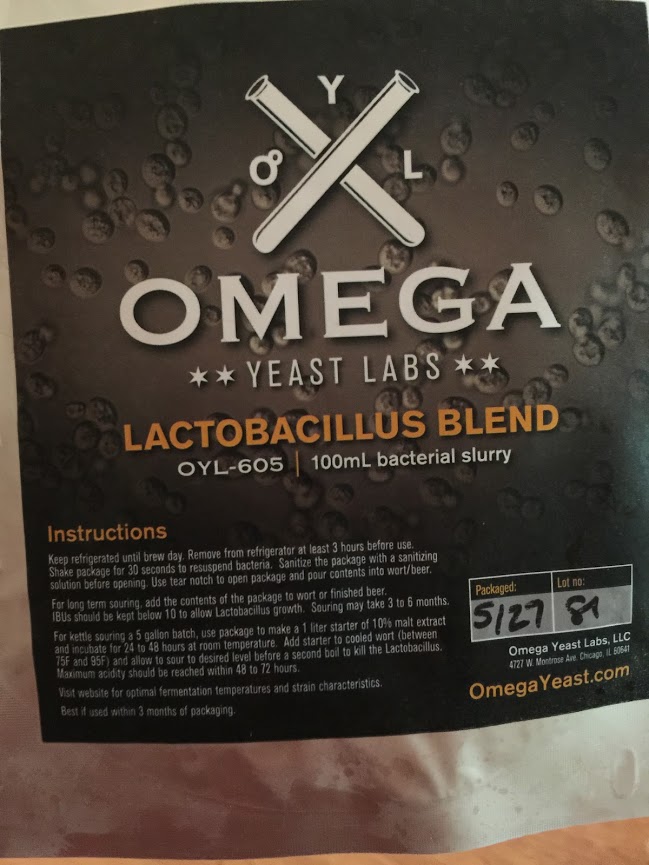
There are three primary lactobacillus strains available to homebrewers that can be used to brew a Berliner Weisse or quick sour an ale. Lactobacillus delbrueckii, lactobacillus brevis, and lactobacillus plantarum. Delbrueckii and Brevis are ones you are most likely to encounter during your adventure into brewing Berliner Weisses. The Berliner Weisse blend made White Labs is made with Delbrueckii and a Sacc. strain. Brevis  and Delbrueckii are available through white labs separately. Some yeast vendors are starting to come out with blends that contain brevis. Plantarum usually isn’t found at your homebrew store, but it is known to be used as a probiotic, so  you can pick this up online  or at your local health food store relatively easily. You maybe able to plantarum from yogurt or other food product that contains it as a probiotic.  Wyeast does distribute a lactobacillus buchnire strain, but we are not familiar with working with that particular strain.

Personally, brevis and plantarum are the strains of lactobacillus we would recommend folks using in their Berliner Weisses or quick soured ales. Brevis and plantarum work very well and quickly in fresh warm wort. We haven’t had much success using delbrueckii, so we would recommend avoid using it or blends where delbrueckii is the only strain of lactobacillus. If a blend has delbrueckii and another quick acting strain, go ahead and use it; just know that the tartness in the beer is most likely not coming from delbrueckii. Brevis and 2015-10-29plantarum also work very quickly, usually with in 24 hours to give the beer a very strong tartness. Usually a pH of 3.5 can be reached with in 24 hours. Both strains produce citrus-like flavors and provide a relatively clean sourness.
Fermentation/Sour Wort Temperatures

Lactobacillus doesn’t like being kept cool. Most strains prefer being kept between 90° F to 110° F. Wort tends to sour more quickly the higher the temperature. Staying within this temperature region for 24 hours is generally long enough for beers containing lactobacillus to reach their minimum pH, usually around 3.4-3.5. If you don’t want to beer to be aggressively sour, you can ferment at cooler temperatures for 24 hours then pitch the yeast you plan on using to complete fermentation. We recommend pitching lactobacillus at warm temperatures (above normal ale yeast tempeatures, 90-110° F) and then cooling to ale temps after 24 hours and then pitching your favorite ale sacc. strain. We’ve had good luck using European Ale Yeast (WLP011) and US-05 in our berliner weisses.

Oxygen Pickup

Oxygen is your worst enemy when working with lactobacillus. You are almost in a tough place when working with lactobacillus. Lactobacilllus doesn’t like oxygen, but your standard brewing yeast does. However, in the presence of oxygen, there are many off flavors and aromas that can occur.

  • Acetic acid – think of how your standard white vinegar tastes. Although acetic acid in a Berliner Weisse is inappropriate for the style, it can be present in low levels in other sour ales such as a Flanders Red.
  • Butyric acid – you remember in college when you drank too much and here comes the McDonalds you ate after you left the bar? Yeah, that’s what butyric acid is. That is a flavor and aroma compound you do not want showing up in any style of beer.
  • Isovaleric acid – when you smell this beer you instantly want a plate of spaghetti. Not really, but with this compound it can smell like Parmesan cheese or some stinky feet that just got back from the gym.
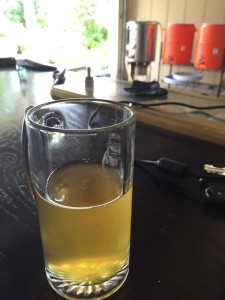
Photo May 09, 11 52 20 AMWhen you are done boiling your wort for your sour ale, you do not want to oxygenate your beer. You want to transfer your wort from your kettle to your fermenter as carefully as possible. Some splashing is ok, but excessive amount could induce too much oxygen. If you are going to keep the wort in the kettle and kettle sour your beer, you will want to flush the wort and head space in your kettle with CO2 or nitrogen and then seal the lid by applying some tape or plastic wrap around the edge of the lid. You want to make the kettle sealed and full of CO2 or nitrogen.

One things we have both forgotten to do at some point while brewing up our first batches of Berliner Weisse is keeping the airlocks full. If you are letting the beer sit in primary for a long period of time and you let the air lock run dry, you run a very high risk of letting some of that lactobacillus produce some acetic acid. So, keep those air locks full!

Hops and Hoping Rates
Lactobacillus hates hops. Lets say this one more time, lactobacillus HATES hops. Most recipes call for 3-5 IBUs of bitterness in the boil.  We find this to be too high for lactobacillus. Hops really are effective at keeping lactobacillus at bay, so you don’t want very much in your beer. We highly recommend going with no hops in your Berliner Weisse. Who can taste 5 IBUs of bitterness? The reason most recipes have hops noted is so they follow the Reingeitsgebot. If we had to guess, just about no one, so we just skip adding hops all together. However, what if you want hop flavor in your sour ales? Well, the best solution to that is to blend with a hoppy beer or dry hop your sour ales. A dry hopped Berliner Weisse/sour ale is quiet refreshing and the acidic character often times brings new notes to hops to the surface that you wouldn’t have noticed in a regular beer.

Levels of pH

Having a pH meter is not necessary for brewing up a delicious sour ale. However, they can be very useful in the fermentation process. Pitching rates, temperatures, and the type of wort the lactobacillus is pitched in can have an affect on how long it takes for lactobacillus to drop the pH of your beer. Having a pH meter gives you another tool to dial in your process and give you more control over how sour your beer is. Say for example you just want a slightly tart beer. Well you can let lactobacillus do it’s thing until you hit a pH of 3.6-3,7, then cool to your normal ale fermentation temps, and let the yeast finish off the sugars. Your pH will drop a little bit from the fermentation process, but you’ll be left with a tart beer and not a crazy sour beer. On the other hand, you can monitor the pH of your beer until it reaches its terminal pH and then ferment your yeast. A pH meter just gives you the ability to have more control of your fermentation process. We will be having a future post about how to measure pH and go about maintaining pH meters.
For deciding how far to take the pH with your sour beer, you need to know what pH gives you specific level of sourness. We have provided some basic numbers below.
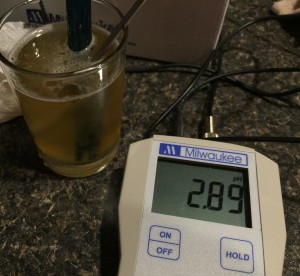
  • Photo Jun 23, 6 12 48 PM4.5-3.9: Imperceptible
  • 4.0-3.6: Perceived brightness to the beer. This is a great pH range for brightening up a fruit beer.
  • 3.5-3.4: Good level of tartness. Appropriate range for a Berliner Weisse
  • 3.2-3.3: Very sour
  • 3.1-3.0: Extremely sour
  • Less than 3.0: Will dissolve your teeth (joking). A pH and below 3.0 is for the hardcore sour ale drinker. Be sure to take your antacids.

If you are kettle souring, it is highly recommended to reduce the pH of your wort to 4.5 before letting your wort sit for a long period of time and boiling for the second time. You are limiting the types of bacteria that can thrive in wort by reducing the pH to 4.5. This will help keep the beer cleaner and keep unwanted critters from settling in. You can find lactic acid solutions (usually 88% by weight) at your local homebrew store. Just add small amount of this solution (start with 1 ml at a time) until your pH falls to 4.5. Then pitch your lactobacillus and you are ready to go.

We have a particular method for checking the pH of our sour wort. (Note:  we always remove samples of the wort and measure the pH of the removed sample. We never check the pH of the wort by sticking the probe into the fermenter, doing so is a pathway for cross contamination.) For our sour ales, we typically remove about 6-8 oz of wort from the fermenter and place it into a sanitized pint glass. For all intents and purposes, we assume the wort in the fermenter at this point is homogeneous and the removed sample is a good sample of the wort in the fermenter. We measure the pH of the sample in the pint glass. Rinse probe with water and stick it back into its storage container.  Then cover the pint glass with plastic wrap and keep it next to the fermenter so they are maintained at the same temperature. Do not pour this sample back into the fermenter. When it comes time to check the pH of the wort again, We just remove the plastic wrap and measure the pH again in the pint glass. The pH of the wort in the pint glass should be the same as the wort in the fermenter.

Special Equipment

Lactobacillus likes to hide in all of nooks and crannies of brewing equipment. It’s important that you have a duplicate set of any equipment that is made of plastic (example: racking canes, bottling buckets, carboy caps, air locks, etc.). Lactobacillus can be extremely difficult if not impossible to remove from slightly scratched plastic surfaces. If you don’t want to keep separate pieces of equipment, use equipment that is made of stainless steel or can be safely boiled without damaging the specific piece of equipment. We have boiled pieces of equipment like carboy caps to pasteurize with good success.


Brewing A Berliner Weisse

OPhoto May 01, 5 57 54 PMk, so we gave you a crash course on the basics of brewing a Berliner Weisse, so lets go through the whole process from start to finish real quick.
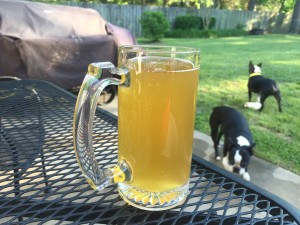
  1. You’ll need a wort that is around 1.030-1.035 OG that is roughly 50% continental pilsner and 50% white or red wheat. If you are an extract brewer, you’ll want to use a 50/50 mix of pilsner and wheat malt extracts.
  2. The boil
    1. If you are doing all-grain, boil for 90 minutes to drive off any dimethyl sulfide. If you’d like to experiment, you could look into doing a no-boil Berliner Weisse.
    2. If you are doing extract, bring your wort to a boil. You do not need to boil more than a few minutes.
  3. Chill your wort to 110° F.
  4. Carefully, without splashing, Transfer to a glass carboy or stainless fermenter. You can use a plastic bucket, but don’t use this bucket for anything other than Berliner Weisse or other quick sour ales and don’t leave it in there for more than a few weeks.
  5. Pitch Lactobacillus and maintain the fermentation temp above 90° F.
  6. After 6 hours, remove 6-8 oz from the fermenter (use a dedicated wine thief) and measure the pH.
  7. Check the pH every few hours. When the pH hits 3.5-3.6, move the beer to a cooler location so the beer can come to friendly ale fermentation temps. Assume the pH will fall to the desired 3.4-3.5 range during the cooling process.
  8. Once the beer has cooled to about 70° F, pitch your favorite ale yeast (WLP011 is the most traditional).
  9. Ferment for two weeks.
  10. Package as a normally fermented beer, but be sure to use your dedicated/separate sour ale transferring equipment.
 

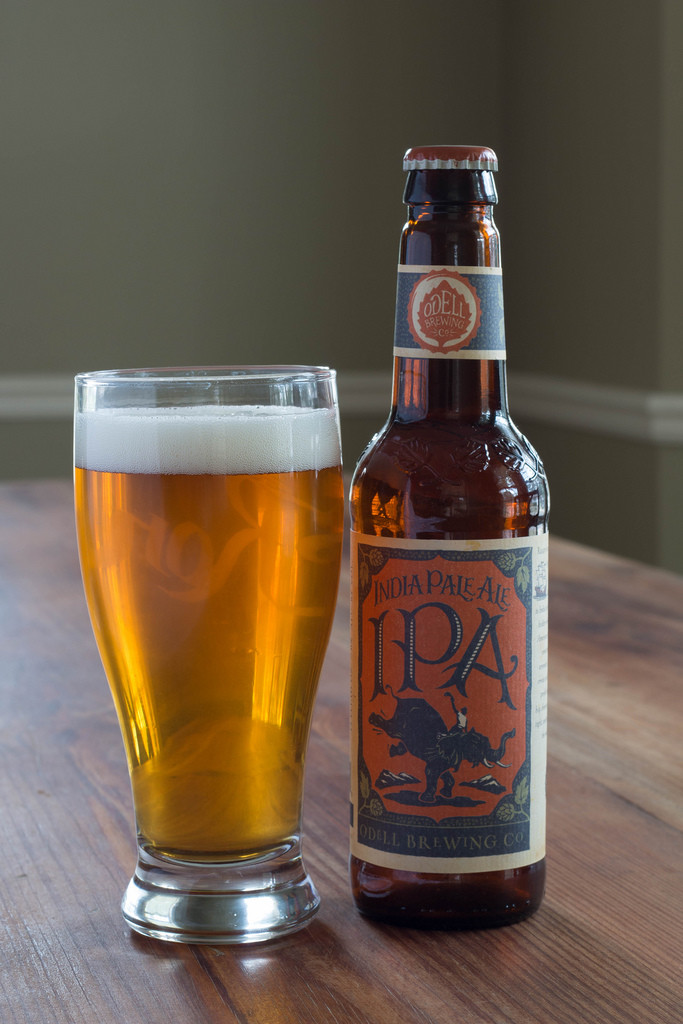
BJCP Scoresheet – Odell IPA

OdellIPAEntry: 003
Judge: Ron Unz
BJCP ID: F0711
Rank: Certified
Beer Name: Odell IPA
Category: 21A – American IPA
Special Ingredients: None
Bottle Inspection: Ok.
Comments: None:

Aroma: 8/12

Moderate-low caramel malt sweetness. Moderate floral hop aroma with moderate-low citrus notes. No fruity esters. No diacetyl.

Appearance: 3/3

Depp gold in color. Very clear. Tan head with tiny tight bubbles. Good head retention.

Flavor: 15/20

Moderate-low caramel up front, slightly too high for style. Citrus and pine hop flavor, moderate. Moderate-high bitterness. Clean fermenation. No fruity esters. Malt is moderately sweet. Slightly cloying. Balance is a little on the sweet side. Bitterness and sweetness follow into the finish.

Mouthfeel: 3/5

Medium-full body. Medium carbonation. No warmth. Low astringency in the finish.

Overall Impression: 8/10

Hop flavor is appropriate for style. Hop aroma could be a little higher for style, increasing carbonation sightly should help. Residual sweetness is too high for style. The sweetness also leads to a body that is too full for style. Caramel flavor is also borderline high. Back off malt by 10%-20%. Overall a very good beer. Great hop flavor.

TOTAL: 37/50

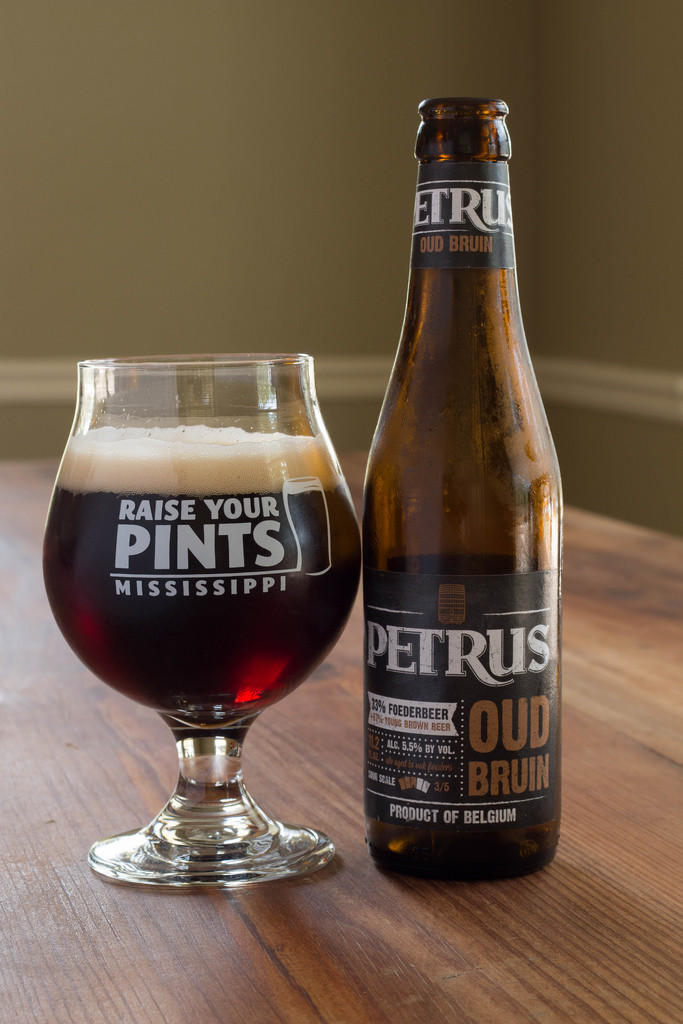
BJCP Scoresheet – De Brabandere Petrus Oud Bruin


19454445840_e413f3d35e_b
Entry:
 002
Judge: Ron Unz
BJCP ID: F0711
Rank: Certified
Beer Name: De Brabandere Petrus Oud Bruin
Category: 23C – Oud Bruin
Special Ingredients: None
Bottle Inspection: Ok.
Comments: None

Aroma: 9/12

Upfront sour aroma. Moderate notes of blackberries and dark cherries. Low malt sweetness. Sour notes are moderate-high. Malt aroma improves as the beer warms. No diacetyl.

Appearance: 3/3

Very dark ruby color. Very clear. Tan head with tiny bubbles. Great head retention.

Flavor: 17/20

Moderate-low bready malt flavor. Low caramel malt sweetness. No hop flavor. Low bitterness. Moderate-low tartness. Very bright. Moderate-low notes of plums, figs, and tart cherries.  Balance is semi-dry. Very low sweet fig flavor lingers into the finish. Fruit character intensifies as the beer warms. No diacetyl.

Mouthfeel: 5/5

Medium body. Medium-high carbonation. Some what tingles the tongue. No warmth. No astrongiency.

Overall Impression: 9/10

The malt aroma and flavors were a little low, especially in the aroma. The malt flavor was more prevalent and more appropriate to style. Sourness was more pronounced in the aroma and could very well be masking the malt aroma. Tartness level is perfect. Over all a very solid beer. Increase the malt every so slightly for both flavor and aroma.

TOTAL: 43/50


Comments: I am usually not a huge fan of oud bruin. I have always found them kind of ‘meh’. I have had both Liefmans’ version of the oud bruin and I was not impressed with them either. This is by far the best oud bruin I have ever had. I am very impressed with it. It has enough complexity in the aroma and flavor to compete with some of the other sour ales, such as flanders red.