Scoresheet Saturday: Yalobusha Copperhead Amber Ale

Yalobusha Brewing in Water Valley, Mississippi is among the breweries of the recent Mississippi craft beer explosion. They came on the scene a couple of years ago along with several other up and coming breweries in the Magnolia State, and have been a welcome addition along with all the others.

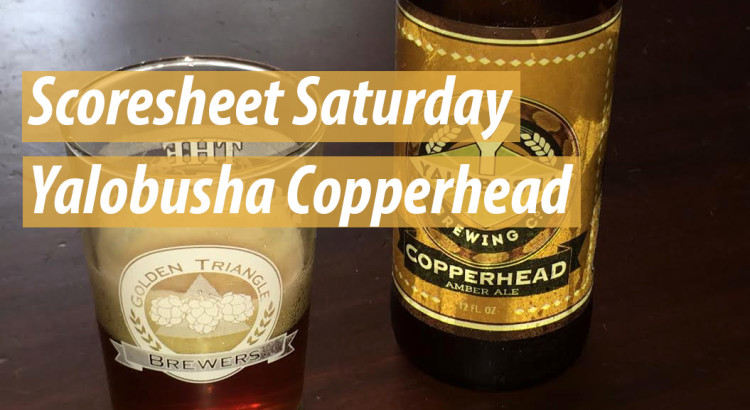
One of my favorite Mississippi brews is Yalobusha’s Coperhead. Described by the brewery as a “unique copper colored ale with nutty toasted malt” and “amber ale.” When constructing a BJCP score sheet for it, I found it could be more fairly evaluated using the Red IPA style. The beer comes in at 65 IBU and 5.6% ABV. This is more in line with the Red IPA style than the American Amber Ale style, so I decided to use the guidelines for Red IPA.

Judge: Richard Bryant
Beer Name: Yalobusha Copperhead Amber Ale
Category: 21B Specialty IPA – Red IPA
Special Ingredients: None

Aroma: 9/12

Grainy sweet malt, light toasted bread with moderate piney hops. Low level of caramel aroma. Very low esters.

Appearance: 3/3

Copperhead Amber Ale
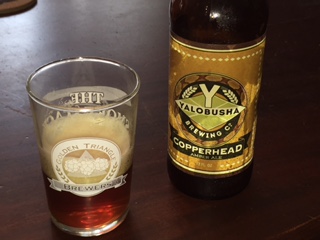
Deep copper color and clear with a large cream colored foamy head that last for the whole glass.

Flavor: 17/20

Balanced well toward the hop flavors and bitterness. Hop flavor is moderately high with a very piney note. Clean fermentation with a low caramel malt sweetness that is barely perceptible and a very low dark toast flavor. Finishes clean and dry with a lingering bitterness,

Mouthfeel: 3/5

Medium body with a moderately high carbonation. Slightly creamy due to the head and very slightly astringent.

Overall Impression:
 7/10

Highly hopped and clean Red IPA. Somewhat dry. The hoppy balance tends to overpower the caramel and toast flavors that are relegated to the background. Overall a pleasant beer drinking experience especially for lovers of hoppier ambers. This beer sits on the fence between American Amber Ale and Red IPA coming in at 65 IBU and5.6% ABV it fits with Red IPA, but the drinking experience sits in the middle.

TOTAL: 39/50

Comments: This beer is one of those beers that are much more enjoyable to drink and enjoy than to try to evaluate. I really love to drink this beer after a day of work while cooking dinner or going through some other task. This score sheet goes to show how difficult it is to evaluate a beer you have already decided you like especially using the BJCP guidelines which were designed for homebrew competitions. Of course this beer is not a home brew, and has no reason to comply with the guidelines. In any case Copperhead is a very nice drinkable ale. Try it! You’ll like it!

Leftover Ingredients? Brew with Them!

This weekend as I was cleaning my Man Cave (really it’s just a musty basement) I walked by the 5 gallon bucket where I throw all the leftover grain from ingredient orders. You know the deal. Partial bags of specialty malts, some crystal 40 here, black patent there. When I saw the bucket, I thought, I better do something with this before all this goes bad. So I sat down to do an inventory. When you inventory your leftover grain be thinking in terms of recipe. Ask yourself, “If I was reading this list of ingredients in a recipe, what style of beer would I be looking at?” If you have English pale malts and some crystal, for example, you may think, “bitter.” You can brew good bitter with either American or English hops, so don’t worry about pairing it up with English hops only. If you are looking at a bunch of Vienna malt (like I was) you may think something along the lines of a Vienna lager (or a faux lager with neutral ale yeast) or some other toasty malty beer.

I had a lot of Vienna, but I had no Munich with which to pair it, so the Oktoberfest was out. I had a few pounds of base grains left from previous batches. I saw some Golden Promise, pilsner, 2 row, various crystal malts,  and various and sundry other items. I already have 5 gallons of bitter in the beer fridge, and I have been brewing those a lot lately, so I kept thinking. A quick check of the freezer revealed partial hop packets of Warrior, Horizon, and Amarillo. I had a few full packets of Centennial and Simcoe. It should be obvious what my next thought was. . .IPA, of course.

The guys in the brewing class I am teaching with Jeremy had talked about how much they love IPA. A small batch could probably be ready to drink before the 5 class sessions over the next month and a half end. Since I didn’t have quite enough base grain to to a full 5.5 gallon batch, I quickly scaled down to 3 gallons and improvised a recipe. Here is what I came up with:

4lbs 12 oz Golden Promise

1 lb 5 oz Pilsner

8 oz Crystal 15

4 oz Dark Wheat

3 oz Crystal 40

3 oz 2 Row

3 oz White Wheat

0.2 oz Horison 11.5%AA @ 60 minutes

0.2 oz Warrior 16%AA @60 minutes

0.6 oz Centennial 9.5%AA @ 10 minutes

0.6 oz Simcoe 12.5%AA @ 5 minutes

0.6 oz Amarillo 8.2%AA@ Flameout

Mash at 149F for 90 minutes, 90 minute boil, Safale US-05 Yeast fermented at 67F.

That gave me the following specs in BeerSmith:  Batch Size-3 gallons, OG of 1.066, IBU-65, FG of 1.012, ABV-7.1%, 7.6 SRM.

What came next was a frenzy of compiling and crushing all the grains and a quick small batch brew day. While I was at it, I had a Super Bowl gathering to attend later in the day, so I decided I’d dry some of my spent grains and whip up some of Jeremy’s Spent Grain Buttermilk Biscuits that he blogged about here earlier. They would go well with a backwoods Super Bowl party.

Be right back after brewing. . .

Well, sometimes the brew gods give, and sometimes they take away. I missed by original gravity on this recipe by a long way. It was supposed to be 1.066, but I ended up at 1.052. I imagine the small batch size and different equipment profile threw off my BeerSmith calculations. Not to worry, it will just be one of those “session ipas” I keep hearing about. In any case, relax, don’t worry, have a homebrew.

My 90 minute boil may not been vigorous enough, but the volume hit pretty spot on. With the early Mississippi February daytime temperature today at about normal at 57F, and night time temps hitting near freezing, my groundwater is pretty cold. I was able to chill this small 3 gallon batch well below 70F with my copper  immersion chiller in no time at all (ok. really about 15 minutes). That’s my favorite thing about winter brewing in the South. Quick chilling but still not bone chilling cold on the patio. There is no way you can chill with an immersion chiller and ground water in under 45 minutes or so in summer time here.

Anyway, I went straight to the fermenter, straight away pitched my US-05 yeast, and  then straight to the fermentation chamber. The wort smelled fantastic, and it foreshadows a wonderful “session” IPA. I will let you know how it turns out in a couple of weeks.


Harvesting your “Crops”: Top Cropping Yeast for Homebrewers

John Smiths Brewery
John Smiths Brewery

Happy New Year! I suppose this entry about harvesting your abundant crop should have appeared at Thanksgiving, but better late than never, and it’s never too late to give thanks. So here we go.

You’ve heard and read about it a thousand times in your books about classic brewing techniques. You often see the phrase “a true top cropping strain” when browsing the White Labs of Wyeast yeast inventories. Read an article or watch a video about British brewing and you’re almost sure to hear or see it mentioned. The famous yet elusive top cropping of yeast.

A conversation about top cropping would certainly be incomplete without mention of the famous Yorkshire square. Without going into too much detail the Yorkshire square is a fermenting vessel dating back some 200 years. Traditionally, it is a 2-story square fermenter built from Welsh slate. The top story has a walled deck with an open top. Fermentation takes place in the bottom chamber and the yeast foam pushes into the top chamber and settles onto the deck. The fermenting wort from the bottom of the chamber is pumped over the foam in the top to keep the yeast mixed in. Eventually, the pumping stops, and the beer in the bottom settles and clears. This beer undergoes further manipulation, but that is not relevant to our discussion here. Some breweries still use the old slate square fermenters, but many modern breweries have turned to stainless steel squares or even cylinders. It’s not the shape or material that is important; its the method. Several breweries use the Yorkshire square method including Samuel Smith’s, Theakston, and Black Sheep. Black Sheep explains their process on their website.  Also, this guy built his own Yorkshire square with, apparently, nice results. You may have to scroll down his page to find the square. However, before you go on a slate search, remember, it is the process, not the shape or materials used that we are worried about.


Yorkshire square with yeasty head and the fan shaped recirculating arm visible.

One of the advantages of using this “open fermentation” method is that the brewer can “crop” or collect yeast by removing the foam from the top of the fermenting wort, thus the name top cropping.

Before this post becomes a lesson on Yorkshire squares, let’s get to talking about harvesting yeast by top cropping. There are several methods used by homebrewers. One involves using a big blow off tube from a carboy running into a sanitized container. When the brewer fills the carboy, he or she leaves minimal head space. As the “true top cropping strain” begins to work, the foamy, yeasty head will push out through the blow off and into the container. However, this method seems a bit messy and complicated for me to mess with. I would prefer less clean up.

The method of top cropping I use is much easier in my mind to accomplish. My method is similar to the method of Arcadia Brewing except on a much smaller scale. They use buckets and trash cans with big cylindrical fermenters. I use a spoon and mason jars with an 8 gallon Ale Pale. I start by selecting a strain of yeast that lends itself to top cropping. (A list of top cropping strains appears at the end of this post.) For this post I chose to brew a best bitter using Wyeast 1469 West Yorkshire Ale. This yeast is the yeast used by the Timothy Taylor Brewery of Landlord fame.

I brewed my beer as I normally would. I’ll spare you the boring details since, I assume, if you are reading a blog post about top cropping, you probably already know how homebrewing works. I’ll stick with things relevant to top cropping

  1. It works best to use an 8 gallon fermenting bucket for this method.
  2. Pitch a normal amount of yeast into the bucket with your cooled wort. Place the bucket
    Dirty foam just before the first scraping.
    Dirty foam just before the first scraping.

    lid loosely in place and ferment as normal.

  3. 24 to 48 hours after pitch remove the lid. A “dirty” foam will have appeared on your beer. Use a sanitized spoon to remove the “dirty” parts. This will consist of hop bits and protiens that get pushed to the top by initial fermentation. Discard this foam. Reset lid loosely in place. Boil about a gallon of water and place in the fridge to cool over night.
  4. 72 hours after pitch reopen your bucket. At this time you should see a nice thick cleaner foam on your fermenting beer. Use a sanitized spoon to scrape this foam off and place it into sanitized mason jars. Use as many jars as you need. Use the pre-boiled
    Harvest with a sanitized spoon. I know this looks a lot like the dirty pic above, but it is vastly different. I promise.
    Harvest with a sanitized spoon. I know this looks a lot like the dirty pic above, but it is vastly different. I promise.

    cooled water to fill the mason jars full of foam. You can pour right on top of the foam. Loosely close the lids of the jars and refrigerate. Finally, completely seal your fermenter lid complete with air lock.

  5. A couple of hours after harvesting vent the mason jars as the yeast foam will want to off gas. Once the yeast settles, seal the jars tightly and store in the refrigerator. You should get enough yeast in each jar for a 5 gallon batch if you use it fairly quickly. If not, just make a starter and move forward.
Harvested yeast after a day or two in the fridge.

A couple of things to remember are that you can keep harvesting from this one initial pitch for quite a while before having to buy another smack pack. Just remember to skim and harvest on the same schedule for each subsequent batch. This will keep your yeast consistent. If you harvest early, you may get cells that are quick to peter out. If you harvest too late, you will increase your chance of getting cells that have a tendency not to flocculate. So keep it on schedule, and you should have no trouble fermenting later batches. Always try to harvest from lower gravity lower hopped beers. I have heard of 8 to 10 repitches using this method. I’ll edit this post after I brew with the cropped yeast to let you know how it went.

Top Cropping Yeast Strains

Wyeast 1187 Ringwood Ale

Wyeast 1318 London Ale III

Wyeast 1469 West Yorkshire Ale

Wyeast 3068 WeihenstephanWeizen

Wyeast 3638 Bavarian Wheat

Wyeast 3944 Belgian Witbier

WLP 022 Essex Ale

WLP 038 Manchester Ale

WLP 039 East Midlands Ale

This is by no means intended to be all the strains that are good for top crop harvesting.


A Taste of the Deep South(west)

Enchiladas and American Pale Ale

The argument of just what makes up the South is long and energetic. Seemingly age old questions like “Is Maryland in the South?” as well as brand new arguments such as “How in the world is Missouri in the SEC? They aren’t even in the South, much less the Southeast!” keep cropping up year after year. Many of us in the Deep South think Memphis is “up north” while Memphians would certainly say they are more Southern than Miami, which, is, in fact, further south than all of us. I guess it depends, like most anything else, on perspective. If you feel Southern, you are. Never mind trying to define the authenticity or “Southernness” of others.

With that in mind, I want to talk about one of those places that, depending on whom you ask, is unquestionably Southern or, as the next girl may say, seated firmly in the West: Texas. East Texas is as full of cotton as the Mississippi Delta, and you are just as likely to find Baptists and biscuits in Brenham as you are in Birmingham. However, Texas has another quality. The Lone Star State has a food tradition influenced by Tejano culture that predates its admission to the United States. While Greenville, MS has delta tamales, All of Texas is awash in Tex-Mex, that spicy American mixture of Indian and Spanish cuisine that we all love so much.

On second thought, I don’t want to talk about Texas so much–and I certainly could go on for hours–as I want to talk about Tex-Mex food, specifically that delicious concoction, the enchilada. Well, really I want to discuss the enchilada and beer! What could be more delicious than that?

Just what is an enchilada? Well, the word itself can be translated as “chilied.” Tortillas enchiladas are corn tortillas heated in oil and smothered in chili sauce. According to cook book author, Robb Walsh, they were originally served without fillings and topped with white cheese. In West Texas enchiladas are typically served like pancakes in a stack with cheese, onions, and other toppings in between. It is this type of enchilada I want to show you how to prepare.

Everyone knows how to pair spicy Tex-Mex salsa with a cool crisp Mexican lager. I could sit for hours in the Cantina munching and sipping while the football or soccer game drones in the background. Throw in a few good friends and this could become a marathon in a hurry. What many may not realize it that the spicy and pungent flavors of Tex-Mex pair quite well with the spicy, pungent flavors and aromas of American Pale Ale or IPA/DIPA. Like Tex-Mex, the APA and IPA are an American take on foreign recipes that have come into their well-deserved own. So let’s get to pairing one product of cultural diffusion with another!

In this entry, I will walk you through making spicy West Texas enchiladas as well as a well balanced American Pale Ale to compliment your dish.Read More